
Are your dishes still coming out with spots or streaks even after a full dishwasher cycle? The problem might be hiding in a small but crucial part of your dishwasher—the rinse aid dispenser.
When this dispenser gets clogged or dirty, it can’t release rinse aid properly, leaving your glassware dull and your dishes less than sparkling. But don’t worry—you can fix this yourself! In this guide, you’ll learn simple, effective steps to clean your dishwasher rinse aid dispenser so it works like new again.
Keep reading to discover how a little maintenance can make a big difference in your dishwashing results.

Credit: www.finisharabia.com
Locate The Dispenser
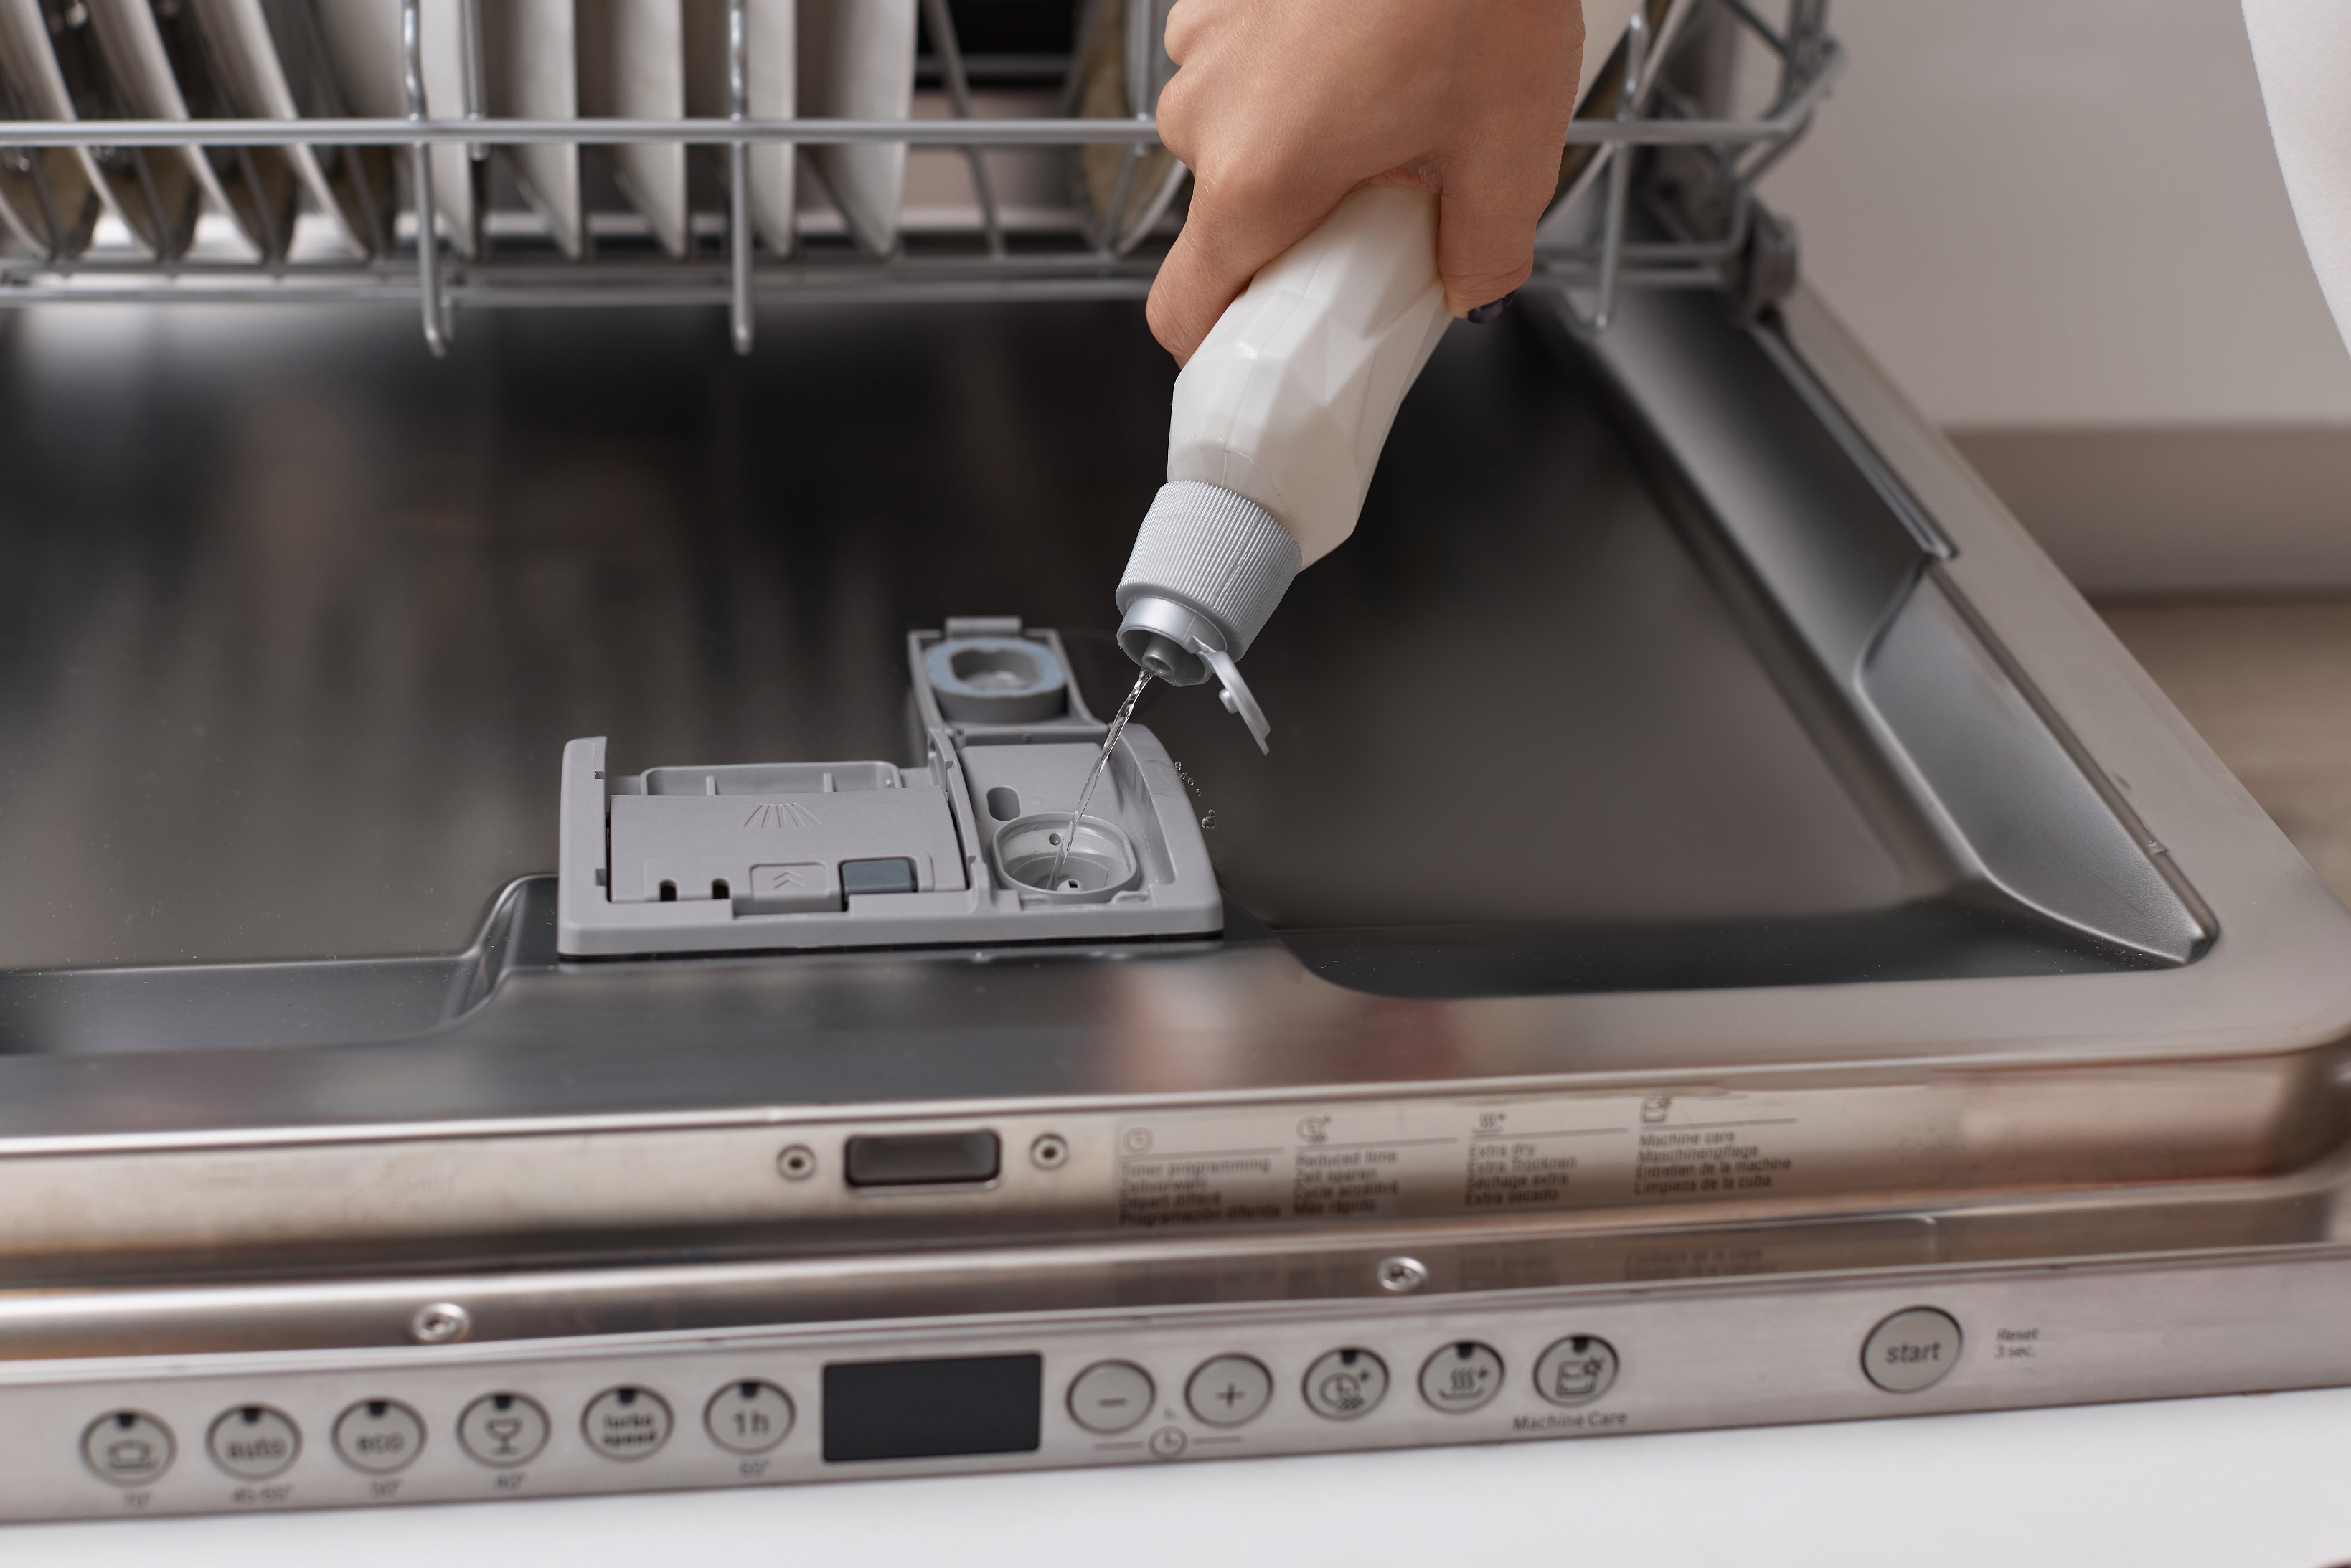
Locating the rinse aid dispenser is the first step in cleaning it properly. The dispenser holds the liquid that helps dishes dry without spots. Knowing where it sits in your dishwasher saves time and effort.
The rinse aid dispenser is usually inside the dishwasher door. You will find it near the detergent compartment. It often has a small cap or lid that you can twist off.
Open The Dishwasher Door
Start by fully opening your dishwasher door. This gives clear access to the inner part of the door. Look carefully along the edge where you load detergent.
Identify The Rinse Aid Compartment
The rinse aid compartment is smaller than the detergent dispenser. It usually has a clear or colored cap. Some models mark it with a symbol like a water drop or waves.
Check The User Manual
If you cannot spot the dispenser, check the dishwasher’s user manual. The manual shows the exact location and how to open the compartment. You can also find it online by searching your dishwasher model.
Inspect The Dispenser Cap
The cap may be twistable or have a small latch. Gently try to open it without forcing. If it feels stuck, use a soft cloth to get a better grip and avoid damage.
Remove The Cap
Removing the cap of your dishwasher’s rinse aid dispenser is the first step in cleaning it properly. This simple task allows you to access the inside of the dispenser, where buildup and residue often accumulate. A clean dispenser ensures the rinse aid works effectively, preventing spots and streaks on your dishes.
Before you start, make sure the dishwasher is off and the door is fully open. This makes it easier and safer to reach the rinse aid dispenser. Handle the cap gently to avoid breaking it, as it is usually made of plastic.
Locate The Rinse Aid Dispenser Cap
Open your dishwasher door fully to find the rinse aid dispenser. It is often near the detergent compartment on the inside of the door. The cap is usually round and clearly marked.
Twist The Cap To Remove
Grip the cap firmly and turn it counterclockwise. It should unscrew easily. If it feels stuck, try turning it slowly to avoid damage. Avoid using tools that might crack the plastic.
Inspect The Cap And Dispenser
After removing the cap, check for any visible buildup or sticky residue. Clean the cap gently with a damp cloth or sponge. Cleaning this part helps keep the dispenser working smoothly.
Clear Visible Buildup
Visible buildup in the rinse aid dispenser can block proper flow and cause spots on dishes. Remove the cap and wipe away any residue carefully. Flushing the compartment with water helps clear leftover rinse aid and keeps your dishwasher working well.
Over time, the rinse aid dispenser in your dishwasher can gather visible buildup. This buildup looks like dried residue or sticky deposits around the cap and inside the compartment. It blocks the proper flow of rinse aid and lowers cleaning efficiency. Clearing this buildup is a simple task that improves dishwasher performance. It also helps avoid unpleasant odors and keeps your dishes spotless.
Start by opening the dishwasher door and locating the rinse aid dispenser. Remove the dispenser cap carefully to expose the inside area. Use a cotton swab, toothpick, or paper towel to wipe away any dried rinse aid or residue you see. Pay attention to edges and corners where buildup tends to accumulate. Removing this layer of grime restores the dispenser’s function and allows rinse aid to flow freely during cycles.
Use Gentle Tools To Remove Residue
Choose soft tools like cotton swabs or paper towels for cleaning. Avoid sharp objects that might damage the dispenser. Gently scrub all visible residue until the surface looks clean. A damp cloth can help loosen stubborn deposits. Make sure to clean both the dispenser cap and the compartment thoroughly. This step prevents clogging and keeps rinse aid flowing properly.
Flush The Dispenser To Remove Hidden Buildup
After wiping visible residue, flush the dispenser to clear hidden buildup. Fill the compartment with clean water. Use a turkey baster or a spray bottle with a thin tube to pump water in and out. Repeat this process until the water runs clear. Flushing removes any leftover rinse aid or residue inside the dispenser. It ensures the rinse aid dispenser works smoothly during dishwasher cycles.
Credit: www.searshomeservices.com
Flush Out Old Rinse Aid
Flushing out old rinse aid from your dishwasher dispenser helps keep it clean and working properly. Over time, residue builds up and can block the dispenser. Clearing this buildup improves the rinse aid flow and prevents spots on your dishes. The process involves removing old rinse aid and washing the compartment until clean. Two simple tools can help you flush out the old rinse aid effectively.
Using A Turkey Baster
Remove the dispenser cap first. Insert the turkey baster into the rinse aid compartment. Suck out the old rinse aid into a glass or sink. Fill the compartment with clean water. Use the baster to draw out the water and rinse aid mixture. Repeat this until the water runs clear. This method removes most residue and clears the dispenser well.
Using A Spray Bottle
Take a spray bottle filled with water. Insert the spray tube into the rinse aid dispenser. Pump water into the compartment to flush out old rinse aid. Spray water out to remove the loosened residue. Continue spraying water in and out until the dispenser is clean. This method works well for hard-to-reach spots inside the dispenser.
Run Empty Wash Cycles
Running empty wash cycles is an important step in cleaning a dishwasher rinse aid dispenser. It helps flush out any leftover residue that may clog the dispenser. This process ensures the rinse aid flows smoothly during wash cycles. Empty cycles use water and heat to clear hidden buildup inside the dispenser and dishwasher.
Running several empty cycles can remove stubborn deposits. It also helps rinse away any detergent accidentally placed in the rinse aid compartment. This step improves dishwasher performance and prevents spots on dishes.
Prepare The Dishwasher For Empty Cycles
Make sure the rinse aid dispenser is cleaned and refilled with water only. Do not add any detergent or rinse aid. Close the dishwasher door securely. Select a short wash cycle without any dishes inside. This prevents waste and focuses on cleaning the dispenser.
Run Multiple Empty Wash Cycles
Start the dishwasher on the selected short cycle. After the cycle ends, check the rinse aid dispenser for any residue. Repeat the empty cycle two to three times. This repetition helps clear stubborn buildup and flushes the dispenser thoroughly.
Use Dishwasher Cleaner For Tough Residue
If residue remains after empty cycles, use a dishwasher cleaner. Follow the product instructions carefully. Run a cleaning cycle with the product to break down tough deposits. Afterward, run another empty cycle to rinse out any cleaner residue.
Use Dishwasher Cleaner
Using a dishwasher cleaner is an effective way to clean the rinse aid dispenser. It helps remove stubborn residue that water alone cannot clear. This method keeps your dishwasher running smoothly and your dishes spotless.
Choose The Right Dishwasher Cleaner
Select a cleaner designed specifically for dishwashers. These products break down grease and buildup inside the rinse aid dispenser. Avoid using harsh chemicals that might damage your appliance.
Prepare The Dishwasher For Cleaning
Remove any remaining rinse aid from the dispenser. Wipe off visible residue around the dispenser area. This step allows the cleaner to work directly on tough buildup.
Run A Cleaning Cycle
Place the dishwasher cleaner in the detergent compartment. Run an empty cycle on the hottest setting available. The cleaner will circulate and dissolve deposits inside the rinse aid dispenser.
Repeat As Needed
For heavy buildup, repeat the cleaning cycle. Regular use of a dishwasher cleaner prevents future clogs in the rinse aid dispenser. This helps maintain dishwasher performance over time.
Refill And Test The Dispenser
Refilling and testing the rinse aid dispenser ensures your dishwasher works efficiently. A properly filled dispenser helps prevent spots and streaks on dishes. Testing confirms the rinse aid flows correctly during the wash cycle.
Refill The Rinse Aid Dispenser
Open the dishwasher door and locate the rinse aid dispenser. Remove the cap by twisting it counterclockwise. Pour the rinse aid slowly into the dispenser. Fill it up to the maximum fill line marked inside. Avoid overfilling to prevent leaks and messes. Replace the cap securely by twisting it clockwise.
Set The Rinse Aid Dosage Level
Locate the rinse aid dosage control near the dispenser cap. Adjust the setting according to your water hardness and dishwashing needs. A higher setting releases more rinse aid, ideal for hard water areas. Lower settings save rinse aid and reduce consumption. Refer to your dishwasher manual for recommended levels.
Run A Test Cycle
Close the dishwasher door and start a normal wash cycle. Observe if the dispenser opens and releases rinse aid during the rinse phase. Check dishes after the cycle for spots or residue. If spots remain, increase the dosage setting or clean the dispenser again. Repeat the test until results improve.

Credit: www.reddit.com
Frequently Asked Questions
How Do I Clean My Dishwasher Rinse Aid Dispenser?
Remove the dispenser cap and wipe away visible buildup. Use a turkey baster or spray bottle to flush with water until clear. Run empty cycles if needed. For stubborn residue, use a dishwasher cleaner. Refill with rinse aid and securely replace the cap.
How To Remove Dish Soap From Rinse Aid Dispenser?
Remove the dispenser cap and wipe out visible soap residue. Use a turkey baster or spray bottle to flush with water. Repeat until water runs clear. Run empty dishwasher cycles to clear any leftover soap. Refill with rinse aid and secure the cap.
How To Unclog A Rinse Aid Dispenser?
Remove the dispenser cap and clear visible buildup with a cotton swab. Use a turkey baster or spray bottle to flush with water until clear. Run empty wash cycles if needed. For stubborn clogs, use a dishwasher cleaner. Refill with rinse aid and replace the cap securely.
How To Open Dishwasher Rinse Aid Dispenser?
Open the dishwasher door and locate the rinse aid dispenser. Twist the dispenser cap counterclockwise to remove it. Fill or clean as needed, then securely replace the cap.
How Do I Clean A Dishwasher Rinse Aid Dispenser?
Remove the cap and wipe away buildup. Flush with water using a turkey baster or spray bottle until clear.
Conclusion
Cleaning your dishwasher rinse aid dispenser keeps dishes spot-free. Regular cleaning removes buildup and prevents clogs. Use simple tools like a turkey baster or spray bottle to flush residue. Running empty wash cycles helps clear stubborn deposits. A dishwasher cleaner can tackle tough grime.
Always refill with the right rinse aid and test for proper flow. This routine keeps your dishwasher working well. Clean dispensers mean better rinsing and fewer water spots. Maintain your dishwasher for fresh, clean dishes every time.