
Is your ceiling fan spinning just fine, but the light refuses to turn on? It’s frustrating when the fan works perfectly, yet your room stays dim because the light won’t respond.
You might wonder if it’s a simple bulb issue or something more complicated like wiring or a faulty switch. Before you call an electrician or buy a new fan, there are easy steps you can take to diagnose and fix the problem yourself.
In this guide, you’ll learn straightforward tips and tricks to get your ceiling fan light shining bright again—without hassle or extra cost. Keep reading to discover how to bring your fan’s light back to life quickly and safely!
Simple Bulb And Chain Checks
Simple bulb and chain checks often solve ceiling fan light issues quickly. Start with easy steps before trying complex fixes. These checks require no tools and take only a few minutes. They help rule out common problems like burnt-out bulbs or a stuck pull chain.
Replace All Bulbs
Replace all bulbs in the ceiling fan light kit at once. Even one burnt-out bulb can cause the entire light to fail. Use bulbs with the correct wattage and type as recommended by the fan manufacturer. Avoid mixing old and new bulbs. New bulbs ensure proper electrical flow and brightness. This step often fixes the problem without further effort.
Test Light Pull Chain
Pull the light’s chain several times to check for proper function. The chain may be stuck, broken, or disconnected inside the light kit. Sometimes there are two chains—one for the fan and one for the light. Make sure you are pulling the correct chain. If the chain feels loose or does not click, it might need repair or replacement. A working pull chain allows the light to turn on and off smoothly.
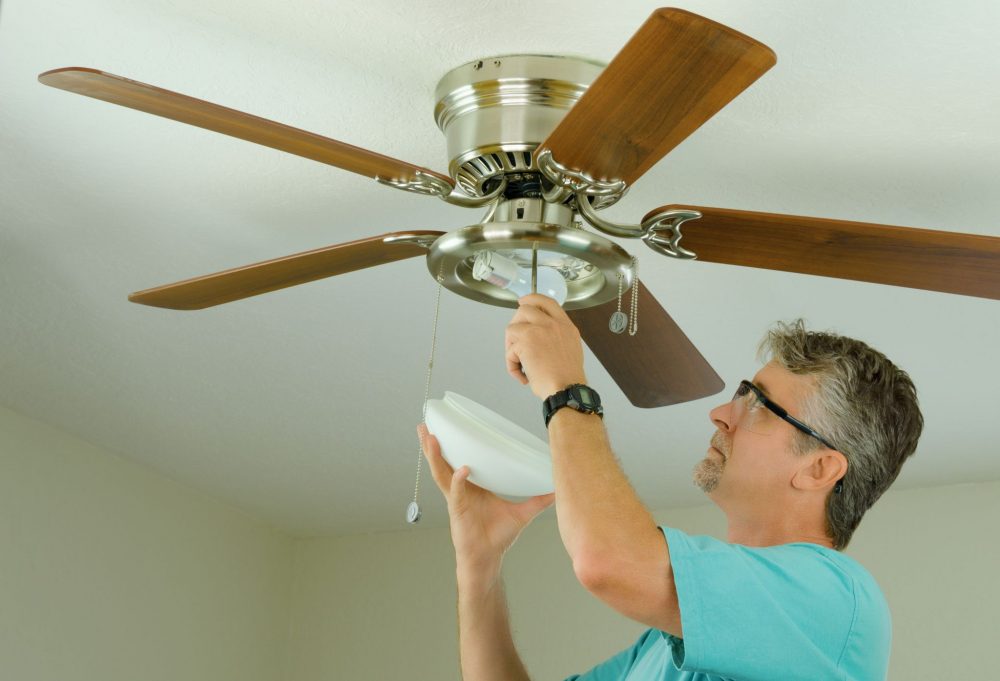
Credit: hendersonelectric.com
Wall Switch And Dimmer Settings
The wall switch and dimmer settings play a key role in the light on your ceiling fan. These controls manage the power flow to the light fixture. Incorrect switch position or dimmer settings can cause the light to stop working. It is simple to check and adjust these settings. This can often solve the issue without any need for repairs.
Check Wall Switch Position
Start by locating the wall switch that controls the ceiling fan light. Make sure the switch is in the “on” position. Sometimes, it may be accidentally switched off. Toggle the switch a few times to see if the light responds. If the switch feels loose or damaged, it may need replacement. A faulty switch can cut power to the light. Confirm that the switch wiring is secure if you feel confident doing so. Always turn off the power at the breaker before checking wires.
Adjust Dimmer Controls
If your ceiling fan light uses a dimmer switch, check the dimmer settings. The dimmer might be set too low or turned off, causing the light to remain dark. Slowly increase the dimmer level while watching the light. Some dimmers are not compatible with LED bulbs or ceiling fan lights. Incompatible dimmers can cause flickering or no light at all. Consider replacing the dimmer with a standard switch if issues persist. Proper dimmer adjustment ensures the light works smoothly and saves energy.
Circuit Breaker And Power Reset
The circuit breaker plays a key role in powering your ceiling fan light. A tripped breaker can cut power, causing the light to stop working. Power reset through the breaker is a simple fix that restores electricity safely. This method avoids risks linked to electrical faults and keeps your fan light functioning.
Checking the circuit breaker is a quick first step. It helps confirm if the issue is electrical or related to the fan itself. Resetting the breaker can solve many common problems without extra tools or parts. Follow these steps carefully to restore power to your ceiling fan light.
Locate Fan Circuit Breaker
Find your home’s electrical panel. It is often in the basement, garage, or utility room. Open the panel door carefully. Look for a switch labeled for the ceiling fan or lighting. If labels are missing, identify the breaker by its position or by testing switches.
Each breaker controls power to different parts of your home. The fan’s breaker is usually a single or double switch. Make sure you stand on a dry surface and use a flashlight if needed. Safety first when working near electrical panels.
Reset Tripped Breaker
Check if the breaker switch is in the “off” or middle position. This means it has tripped. Turn the switch fully to the “off” position first. Then flip it back to the “on” position. You should hear a click confirming the reset.
After resetting, test your ceiling fan light. If the light turns on, the problem is solved. If the breaker trips again, do not reset repeatedly. This could indicate a deeper electrical issue. Contact a licensed electrician for help.
Inspect Loose Wiring
Loose wiring inside your ceiling fan often causes the light to stop working. Wires can come undone over time due to vibrations or improper installation. Inspecting these connections carefully can solve the problem without a costly repair. Follow simple steps to check the wiring safely and correctly.
Turn Off Power First
Always cut power at the circuit breaker before touching any wires. This prevents shocks or injuries while inspecting the fan. Double check with a voltage tester to confirm the power is off. Safety is the top priority before starting any electrical work.
Check Wire Connections
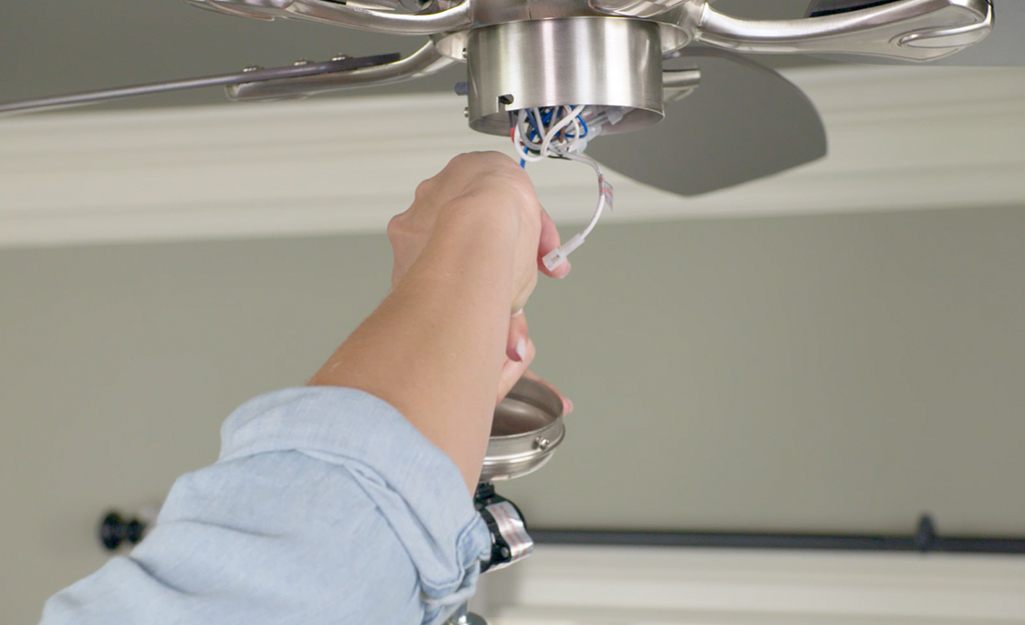
Open the fan canopy to see where the wires connect. Look for loose or disconnected wires. Tighten any loose wire nuts or screws. Make sure wires are fully inserted into their connectors. Secure connections ensure the light gets power properly.
Look For Burn Marks
Burn marks or melted insulation on wires point to overheating or short circuits. These signs mean damaged wiring needs replacement. Do not ignore burn marks as they pose fire risks. Replace any burnt wires or call a professional for help.
Examine Light Socket
Examining the light socket is an important step if the light on your ceiling fan does not work. The socket holds the bulb in place and provides the electrical connection needed to power the light. Dirt, corrosion, or a loose contact inside the socket can stop the light from turning on. Checking the socket ensures the bulb gets power properly.
Start by turning off the power to the ceiling fan at the circuit breaker. This keeps you safe while inspecting the socket. Remove the light bulb carefully. Look inside the socket for any visible damage or dirt. A clean and secure socket is key to a working light.
Check For Corrosion
Corrosion inside the socket can block electricity from reaching the bulb. It often looks like green or white buildup on metal parts. Use a flashlight to see clearly inside the socket. If you spot corrosion, gently clean it with a small brush or fine sandpaper. Make sure the socket is dry and free of debris before testing the light again.
Adjust Metal Contact Tab
The metal contact tab inside the socket pushes against the bulb base to complete the circuit. Sometimes this tab can bend down too far or get pushed flat. Use a small screwdriver or your finger to lift the tab slightly. It should press firmly but gently against the bulb. This adjustment helps the bulb connect properly and can restore power to the light.

Credit: www.youtube.com
Test Faulty Pull Chain Switch
Testing the pull chain switch helps find why the ceiling fan light fails. The pull chain switch controls the light’s power. If it breaks, the light won’t turn on. Testing the switch saves time and money. It shows if the switch needs repair or replacement.
Bypass Switch Test
Start by turning off the power at the circuit breaker. Remove the fan’s light kit cover. Locate the pull chain switch wires. Use a wire connector to join these wires. This bypasses the switch, sending power directly to the light.
Turn the power back on and try the light. If the light turns on, the switch is faulty. If it stays off, the problem is elsewhere. This quick test confirms the pull chain switch condition.
Replace Defective Switch
After confirming the switch is faulty, buy a replacement switch. Choose one matching your fan’s model and voltage. Turn off the power again before starting work. Remove the old switch by disconnecting its wires. Connect the new switch wires following the same order.
Secure the new switch in place and reassemble the light kit. Turn the power back on and test the light. The pull chain should now control the light properly. Replacing the switch restores the ceiling fan light’s function safely and effectively.
Check Wattage Limiter Issues
The wattage limiter in a ceiling fan light kit controls the maximum power the light can use. It prevents the fan wiring from overheating. Sometimes, the limiter causes the light to stop working. Checking the wattage limiter is a key step when troubleshooting the light on your ceiling fan.
This section explains how to identify and fix problems related to the wattage limiter. Follow these simple steps to find out if the limiter is causing the issue.
Remove Bulbs One At A Time
Start by turning off the power at the circuit breaker for safety. Remove one bulb from the light fixture. Turn the power back on and see if the light works. Repeat this for each bulb, one at a time.
If the light turns on after removing a certain bulb, that bulb might be faulty or too high in wattage. The wattage limiter may have tripped to protect the fan. Using bulbs with the correct wattage is very important. Check the fan’s instructions for the recommended bulb wattage.
Identify Limiter Fault
If removing bulbs does not restore the light, the wattage limiter could be faulty. The limiter may have a reset button or fuse. Locate the wattage limiter inside the light kit housing.
Use a multimeter to test the limiter for continuity. No continuity means the limiter is broken and needs replacement. A damaged limiter can stop the light from working completely. Replace it with a compatible part from the fan manufacturer.
Always keep the power off while inspecting or replacing the limiter. Proper testing and replacement can fix the light on your ceiling fan quickly.
Credit: www.homedepot.com
When To Call A Professional
Some ceiling fan light issues need expert help. Simple fixes like changing bulbs are easy. But other problems can be tricky and unsafe. Knowing when to call a pro can save time and prevent injury.
Electricity is dangerous if handled wrongly. A professional has the right tools and knowledge. They can find hidden problems fast. This ensures your fan light works properly again.
Electrical Safety Concerns
Working with electrical wiring poses safety risks. Shocks, burns, or fires can happen without care. Professionals know how to switch off power safely. They use insulated tools to avoid shocks. Mistakes can cause serious harm or damage. Leave electrical checks and repairs to trained experts.
Complex Wiring Problems
Ceiling fans often have complex wiring inside the canopy. Faulty connections or broken switches hide deep inside. Troubleshooting these issues needs skill and experience. Wrong wiring fixes can cause the fan or light to fail. Electric codes must be followed for safety. Professionals diagnose and repair wiring problems correctly.
Frequently Asked Questions
Why Would My Ceiling Fan Work But Not The Light?
Your ceiling fan may work but the light won’t if bulbs are bad, the pull chain is broken, wiring is loose, or the light switch is faulty. Check the circuit breaker and wall switch too. Always turn off power before inspecting or repairing.
How To Fix A Ceiling Fan Light That Won’t Turn On?
Replace bulbs with correct wattage and test the pull chain. Check wall switch and reset tripped breakers. Turn off power, inspect wiring for looseness or damage. Examine light socket for corrosion or contact issues. Test or replace faulty pull chain switch if needed.
Why Has My Ceiling Light Stopped Working?
Your ceiling light may have stopped working due to a burnt-out bulb, tripped circuit breaker, or faulty switch. Check the bulb, reset breakers, and inspect wiring connections for loose or damaged parts. Ensure the light’s pull chain or wall switch functions properly before seeking professional help.
Why Did My Led Ceiling Light Suddenly Stop Working?
Your LED ceiling light may stop working due to a blown bulb, loose wiring, faulty switch, tripped breaker, or power supply issues. Check the bulb, wiring connections, and circuit breaker first. Ensure the light switch is on and inspect for any damage or corrosion in the socket.
Why Is The Ceiling Fan Light Not Turning On?
The bulb may be burnt out, or the light switch is off or faulty.
Conclusion
Fixing a ceiling fan light often starts with simple steps. Change the bulbs and check the pull chain first. Ensure wall switches are on and dimmers are adjusted properly. Look at the circuit breaker to see if it has tripped.
For more complex issues, check wiring connections carefully with power off. Taking these steps can save time and money. Small problems often cause the light to stop working. Don’t rush repairs; safety matters most. With patience, most light issues can be solved at home.