
When it comes to fixing holes or smoothing out your walls, you might wonder: should you reach for joint compound or spackle? Choosing the right product can make a big difference in how your repair looks and lasts.
If you’ve ever struggled with cracks, dents, or drywall seams, knowing when to use each can save you time, effort, and frustration. You’ll discover the key differences between joint compound and spackle, helping you pick the perfect solution for your next repair—whether it’s a tiny nail hole or a large patch.
Keep reading, and you’ll learn exactly which product fits your project, so your walls look flawless every time.

Credit: www.youtube.com
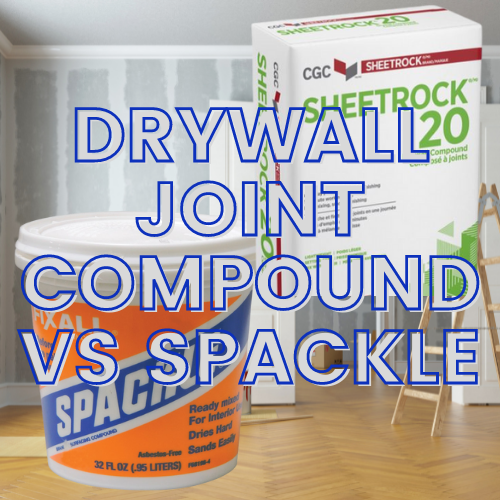
Spackle Basics
Spackle is a lightweight paste used in wall repair projects. It fills small holes, cracks, and dents quickly. Spackle is easy to apply and dries fast, making it a popular choice for simple repairs around the home.
It comes in ready-to-use tubs or pre-mixed tubes. This product requires minimal preparation and cleans up easily with water. Understanding spackle’s key features helps in choosing the right product for your repair needs.
Ideal Uses For Spackle
Spackle works best on small holes caused by nails or screws. It fills minor cracks and dents on drywall surfaces. People often use it for quick touch-ups before painting. It is not suitable for large holes or deep damage. Spackle is perfect for fast fixes that need to dry quickly.
Advantages Of Spackle
Spackle dries within minutes to an hour, speeding up repairs. It is lightweight, so it does not add much bulk to walls. The paste is easy to sand smooth once dry. It cleans up easily with water, without harsh chemicals. Spackle is affordable and widely available in stores.
Limitations Of Spackle
Spackle is not strong enough for large holes or heavy damage. It may shrink slightly as it dries, requiring a second application. Some types of spackle can be difficult to sand evenly. It is not ideal for taping drywall seams or skim coating walls. For bigger repairs, joint compound is a better choice.
Joint Compound Essentials
Joint compound is a key material in drywall repair and finishing. It helps create smooth, even walls. Understanding its uses and features makes any project easier. This section covers the essentials of joint compound.
Knowing when to choose joint compound over other materials saves time and effort. It is important to learn its benefits and possible drawbacks before starting your work.
When To Use Joint Compound
Use joint compound for large drywall repairs. It works well for taping drywall seams. It also fills big holes and cracks. Skim coating walls to create a smooth surface is another use. Joint compound is not for small nail holes or dents. For quick small fixes, spackle is better.
Benefits Of Joint Compound
Joint compound is tough and durable. It sticks well to drywall and tape. It sands easily to a smooth finish. It helps hide seams between drywall sheets. Large areas can be covered with joint compound. It works well for multiple layers. This makes walls look perfect and ready for paint.
Drawbacks Of Joint Compound
Joint compound takes longer to dry than spackle. It often shrinks as it dries, causing cracks. This means multiple thin coats are needed. It can be messy to work with. It requires more sanding effort for a smooth finish. It is not ideal for fast, small repairs.
Comparing Drying Times
Drying time is a key factor when choosing between joint compound and spackle. It affects how fast you can finish your repair or project. Faster drying means quicker sanding, painting, or applying another coat.
Both materials serve different purposes, so understanding their drying speeds helps you plan your work better. Some jobs need speed, while others need durability and smoothness.
Drying Time Of Spackle
Spackle dries very quickly, often within 30 minutes to an hour. This makes it ideal for small repairs like nail holes or cracks. You can finish sanding and painting the same day.
Quick drying saves time on minor fixes. It lets you complete simple jobs without waiting long. But spackle may crack if applied too thickly.
Drying Time Of Joint Compound
Joint compound takes longer to dry, usually 12 to 24 hours per coat. It is best for large repairs, drywall seams, or skim coating. Multiple thin coats often need drying time in between.
Longer drying helps the compound settle and harden well. It reduces cracking and creates a smooth surface. Plan your work schedule accordingly for big projects.
How Drying Time Affects Project Speed
Choosing spackle speeds up small repairs. You can fix holes fast and move on. Joint compound slows down the process but gives a stronger finish.
Consider project size and time available. Use spackle for quick fixes and joint compound for thorough, lasting results.
Durability And Finish
Durability and finish are key factors in choosing between joint compound and spackle. Both materials serve to repair walls, but their strength and final look differ significantly. Knowing these differences helps achieve a lasting and smooth repair.
Durability Of Joint Compound
Joint compound is designed for strong, long-lasting repairs. It holds up well on large wall areas and drywall seams. Its durability makes it ideal for projects that require a solid, lasting fix. It resists cracking and shrinking better than spackle over time.
Durability Of Spackle
Spackle works best for small, quick repairs like nail holes or minor dents. It is less durable than joint compound and may crack with larger or deeper repairs. Spackle is not suitable for heavy-duty wall repairs or areas prone to movement.
Finish Quality Of Joint Compound
Joint compound provides a smooth, professional finish. It sands easily to blend with the wall surface. Multiple thin coats help create an even, flawless look. This makes it the preferred choice for drywall finishing and large surface repairs.
Finish Quality Of Spackle
Spackle dries quickly but may leave a rougher finish. Some types can be hard to sand smooth. It works well for small patches that do not need a perfect surface. For larger repairs, spackle’s finish may look uneven or textured.
Application Techniques
Knowing how to apply joint compound and spackle correctly can save time and improve results. Each product has a different texture and drying time, so using the right technique is key. This section breaks down simple steps for both materials. Follow these tips to fix walls smoothly and efficiently.
Applying Spackle For Small Repairs
Spackle works best on small holes, cracks, and dents. Use a small putty knife to scoop a little spackle. Press it firmly into the hole or crack. Smooth the surface by wiping the knife over the area. Let it dry for about 30 minutes or until hard. Lightly sand the spot with fine-grit sandpaper for a smooth finish. Clean dust away before painting.
Using Joint Compound For Large Areas
Joint compound suits bigger repairs like taping drywall seams or filling large holes. Start by mixing the compound if needed. Use a wide drywall knife to apply a thin layer over the area. For seams, embed drywall tape into the wet compound. Smooth out bubbles or wrinkles with the knife. Let the first coat dry completely, usually 24 hours. Apply one or two more thin coats, sanding lightly between each. Finish with a smooth surface ready for painting.
Sanding And Smoothing Tips
Sanding and smoothing are key steps after applying joint compound or spackle. Proper sanding ensures a flawless wall surface. It also prepares the area for painting or wallpapering. Both materials need different approaches for the best finish. Learning the right techniques helps avoid damage and saves time.
Sanding Joint Compound
Wait until the joint compound is fully dry. This can take several hours or overnight. Use fine-grit sandpaper, around 120 to 150 grit. Sand lightly to avoid gouging the surface. A sanding block or sponge gives even pressure. Clean dust often to see the true surface. Apply a second thin coat if needed, then sand again.
Sanding Spackle
Spackle dries faster than joint compound. Usually, it is ready to sand within 30 minutes. Use fine-grit sandpaper to smooth small repairs. Sand gently around edges for a seamless blend. Avoid heavy sanding as spackle is less durable. Wipe the dust off before painting or priming.
Smoothing Tips For Both Materials
Use a wide putty knife to spread compound or spackle evenly. Apply thin layers to reduce drying time and shrinkage. Feather the edges to blend with the wall surface. After sanding, wipe down with a damp cloth to remove dust. Inspect the surface under good light for imperfections. Repeat filling and sanding on spots that show through.
Cost And Availability
Cost and availability are key factors in choosing between joint compound and spackle. Both materials serve different purposes and come with varying price points. Knowing their costs and where to buy them helps plan your repair or renovation project efficiently.
Cost Of Joint Compound
Joint compound usually costs less per volume than spackle. It is sold in larger containers, such as 1 to 5 gallons. This makes it economical for big projects like drywall finishing or skim coating. Buying in bulk reduces the price per use. Small repairs may feel costly if you buy a large bucket.
Cost Of Spackle
Spackle often comes in small tubs or tubes. It costs more per ounce than joint compound. The price fits quick fixes, like filling nail holes or tiny cracks. You pay for convenience and fast drying time. For small repairs, spackle is cost-effective and reduces waste.
Availability In Stores
Both joint compound and spackle are widely available in hardware stores. Home improvement centers stock several brands and sizes. Online shopping offers even more options. Joint compound is common in paint or drywall aisles. Spackle is easy to find near patching or repair products.
Availability For Different Projects
Joint compound suits large-scale jobs and is often preferred by professionals. It’s available in powder or pre-mixed forms. Spackle targets small, quick repairs and is ready to use out of the container. Knowing which product fits your project helps avoid delays and extra costs.
Choosing The Right Product
Choosing between joint compound and spackle affects your repair’s success. Each product suits different tasks. Selecting the right one saves time and effort. Understanding their strengths helps you pick the best option.
This guide simplifies your choice. Focus on the repair size and project needs. Use the right product for a smooth, lasting finish.
Quick Fixes Vs Major Repairs
Spackle works best for quick fixes. It fills small holes, dents, and cracks fast. Its fast drying time means you can finish repairs quickly. It is easy to apply and sand for a smooth surface.
Joint compound suits major repairs. It handles large holes and drywall seams. It is thicker and more durable than spackle. It may need several coats and more drying time. It also sands well for a flawless finish.
Project-specific Recommendations
Use spackle for nail holes and minor wall damage. It offers a fast, simple repair with minimal mess. Ideal for touch-ups and small patches.
Choose joint compound for drywall installation and big repairs. It bonds well with drywall tape and covers wide areas. Perfect for skim coating and preparing walls before painting.
Consider drying time and sanding ease for your project size. Small repairs benefit from spackle’s speed. Larger jobs need joint compound’s durability and flexibility.
Common Myths And Facts
People often confuse joint compound and spackle. Many myths surround their use, causing mistakes. Understanding facts helps choose the right product for repairs. This section clears common myths and shares true facts.
Myth: Spackle And Joint Compound Are The Same
Spackle and joint compound look similar but are different. Spackle is thicker and dries faster. Joint compound is softer and takes longer to dry. Each has a unique use in wall repair.
Myth: Spackle Is Stronger Than Joint Compound
Spackle is not stronger. It works well for small holes and quick fixes. Joint compound is tougher and better for large repairs and seams. It holds up longer on big projects.
Fact: Spackle Dries Quickly
Spackle dries in minutes to an hour. This speed makes it perfect for small nail holes and dents. Quick drying saves time on minor repairs.
Fact: Joint Compound Requires Multiple Coats
Joint compound shrinks as it dries. It needs two or three thin coats for a smooth finish. Patience with joint compound results in better, long-lasting walls.
Myth: You Can Use Spackle For Drywall Seams
Spackle is not made for drywall seams. It can crack or fall off over time. Joint compound is designed to tape and finish drywall joints properly.
Fact: Joint Compound Is Easier To Sand
Joint compound sands smoothly and blends well with walls. Some spackle types harden too fast and become hard to sand. This makes joint compound better for large surface work.
Credit: masterbuildingmaterials.com
Frequently Asked Questions
Should I Use Joint Compound Or Spackle?
Use spackle for small holes and quick repairs; it dries fast and is easy to sand. Choose joint compound for large drywall seams or big holes; it’s more durable but dries slower and may need multiple coats.
Can Spackle Be Used For Cracks?
Spackle works well for small cracks and quick drywall repairs. It dries fast and hard, ideal for minor fixes.
Is There A Difference Between Joint Compound And Drywall Compound?
Joint compound and drywall compound are the same product, often called “drywall mud. ” Different types suit various tasks, like taping or finishing.
Can You Paint Directly Over Joint Compound?
Yes, you can paint directly over joint compound once it is fully dry and sanded smooth. Prime the surface first for better paint adhesion.
What Is The Main Difference Between Joint Compound And Spackle?
Joint compound is for large drywall jobs; spackle is for small repairs like nail holes.
Conclusion
Choosing between joint compound and spackle depends on the repair size and time. Use spackle for small holes and quick fixes. It dries fast and is easy to apply. Joint compound works best on bigger jobs like drywall seams. It takes longer to dry but gives a smooth, strong finish.
Knowing their differences helps you pick the right product. This ensures your wall repairs look neat and last long. Simple tools and the right material make any repair easier. Try both and see which suits your needs best.