
Ever found yourself standing in your driveway, pressing buttons on your Liftmaster keypad, only to be met with silence? You’re not alone.
A non-responsive keypad can be frustrating, especially when you’re in a hurry. But don’t worry, resetting your Liftmaster keypad is easier than you might think. In this guide, you’ll discover a straightforward way to bring your keypad back to life, eliminating your daily garage door woes.
By the end, you’ll feel empowered with the knowledge to tackle this issue head-on, ensuring seamless access to your garage. Ready to regain control and peace of mind? Let’s dive in!
Liftmaster Keypad Basics
The Liftmaster keypad is a convenient device for garage access. It allows secure entry without a remote. Understanding its basics helps in easy operation. This keypad is commonly used in homes with a Liftmaster garage door opener. It provides quick access, ensuring security and efficiency.
With a few simple steps, you can program and reset it. This guide will explain the essential features and functionality of the Liftmaster keypad. You’ll learn how to manage your garage door access with ease.
Understanding The Liftmaster Keypad
The Liftmaster keypad is wireless and operates on a battery. It mounts easily outside your garage door. You can open your garage by entering a code. This feature is especially useful if you misplace your remote. The keypad ensures you never get locked out.
Keypad Components And Features
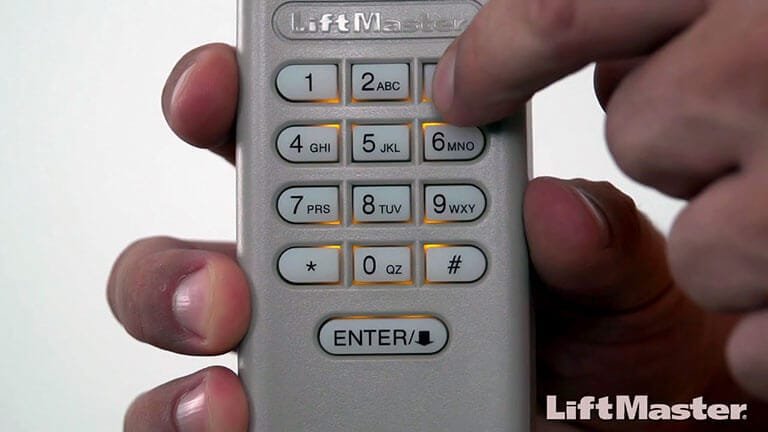
The keypad has a durable, weather-resistant design. It features a numeric pad with backlit numbers. This makes it easy to use at night. The keypad also includes a “Learn” button. This button helps in programming and resetting the device.
How The Liftmaster Keypad Works
The keypad communicates with the garage door opener using radio signals. You enter a personalized code to open the door. This code can be changed anytime for security. The keypad stores the code in its memory, ensuring reliable operation.
Preparation For Resetting
Resetting your Liftmaster keypad might seem daunting at first. Proper preparation ensures a smooth process. Before you begin, gather the necessary tools and understand the safety measures. These steps are crucial to avoid any mishaps during the reset. Let’s explore how to prepare for resetting your Liftmaster keypad effectively.
Tools Needed
Start by collecting a few essential tools. You need a Phillips screwdriver to access the keypad. A small flashlight can help illuminate dark areas. A ladder is necessary for reaching higher mounted keypads. Keep a pen and paper handy to note any codes or instructions. Ensure these tools are ready before proceeding.
Safety Precautions
Safety is a priority when working with electronic devices. Disconnect the power to the keypad before starting. This prevents electrical accidents. Use a sturdy ladder to avoid falls. Ensure the area is well-lit for better visibility. Wear protective gloves to prevent sharp edges or wires from causing injuries. Follow these precautions for a safe reset process.
Locating The Learn Button
To reset your Liftmaster keypad, first locate the Learn button on your garage door opener. It is usually found on the back or side of the motor unit. Press and release the button to start the reset process.
Finding the “Learn Button” on your Liftmaster garage door opener is crucial for resetting the keypad. This tiny button is your gateway to simplifying your life, allowing you to sync and secure your home with ease. However, locating it can sometimes be a bit tricky, especially if you’re not familiar with the inner workings of your garage door opener.
It was a rainy Saturday when I first decided to reset my Liftmaster keypad. I remember staring at the garage door opener, feeling slightly overwhelmed by the array of buttons and wires. But once I found the elusive “Learn Button,” everything fell into place.
What Is The Learn Button?
The “Learn Button” is a small button located on your garage door opener. It’s usually either square or circular and can be found in various colors like red, yellow, or purple. This button is a key component in programming your remote control and keypad.
Where To Find The Learn Button?
Typically, you’ll find the “Learn Button” on the back or side of your garage door opener motor. It may be hidden under a light cover or near the antenna wire.
Think about the last time you had to search for something small but essential. The “Learn Button” is similar—it’s not immediately visible, but once you find it, it’s a relief.
Steps To Locate The Learn Button
– Safety First: Ensure your garage door is closed and the opener is off before you start your search.
– Check the Manual: Your Liftmaster manual is a handy guide, often providing exact details on the button’s location.
– Inspect the Motor Unit: Look around the motor unit of the opener. You might need to stand on a stepladder to get a better view.
Why Is The Learn Button Important?
The “Learn Button” is crucial because it helps you reset your keypad, sync new devices, and ensure the security of your garage door. Without it, programming becomes nearly impossible.
Have you ever struggled with technology, only to find that one missing piece suddenly solves all your problems? That’s the power of the “Learn Button.”
Troubleshooting Tips
– If you can’t find the button: Check different sides of the motor unit or consult online resources specific to your model.
– If the button doesn’t respond: Ensure the power supply to the opener is working correctly.
In your quest to reset the Liftmaster keypad, finding the “Learn Button” is like discovering a hidden gem in your garage. Once you’ve located it, programming becomes straightforward, leaving you with a sense of accomplishment and a more secure home.
Resetting The Keypad
Resetting a Liftmaster keypad involves pressing the ‘Learn’ button on the motor unit, then entering a new code on the keypad. Ensure you hold the button until the indicator light blinks, signaling readiness for the new code. Follow the steps carefully to ensure successful reset.
Resetting the keypad on your Liftmaster garage door opener might seem daunting at first, but it’s surprisingly straightforward. Whether you’re dealing with a forgotten code or a malfunctioning keypad, a reset can often provide a quick fix. Imagine the relief of effortlessly accessing your garage once more without the frustration of a stuck door. Let’s dive into how you can easily reset your Liftmaster keypad and get back to seamless operation.
Step-by-step Guide
Resetting your Liftmaster keypad is a simple process. Here’s how you can do it:
1. Locate the Learn Button: Start by finding the “Learn” button on your garage door opener. Typically, this button is found on the back or side of the motor unit. It’s often a red or purple button.
2. Press and Hold: Press and hold the “Learn” button until the indicator light turns off. This usually takes about six seconds. Once the light is off, it means that all previous codes have been erased.
3. Enter New Code: Now, go to your keypad and enter your desired four-digit PIN. After entering your code, press and hold the “Enter” button on the keypad.
4. Reprogram the Keypad: Quickly go back to the garage door opener and press the “Learn” button again. Release the button and then press the “Enter” button on the keypad once more. This reprograms the keypad with your new code.
By following these steps, you can easily reset and reprogram your Liftmaster keypad. Have you ever experienced the frustration of a forgotten code at the worst possible time? With this reset, you won’t have to worry about that again.
Testing The Reset
Once you’ve reset your keypad, it’s crucial to test it to ensure everything is functioning correctly.
– First Test: Stand within range and enter your new code on the keypad. Press “Enter” and observe if the garage door responds by opening or closing.
– Second Test: Try the code again, this time from a different angle or distance, to ensure consistency in operation.
– Final Check: Ask yourself, is the door responding promptly without any hesitation? If yes, then you’ve successfully reset your keypad. If not, repeat the steps or consult your manual for troubleshooting tips.
Testing ensures peace of mind. You wouldn’t want to be caught in the rain with an unresponsive keypad. By confirming that your reset worked, you’re securing the convenience of your daily routine. Have you tested your keypad after a reset, only to find it still not working? It could be a sign of a different issue, prompting a deeper look into your system.
How to Reset Liftmaster Keypad [Here is the Troubleshooting Common Issues]
Resetting a Liftmaster keypad can sometimes present challenges. Understanding common issues can help streamline the process. This section focuses on frequent problems users face.
Battery Problems
Weak batteries can cause keypad malfunctions. Ensure the batteries are fresh. Check if they are inserted correctly. Sometimes, cleaning battery contacts helps. Dust or corrosion may block power flow. Swap old batteries for new ones. A simple battery check can solve many issues.
Signal Interference
Electronic devices can interfere with keypad signals. Nearby Wi-Fi routers or cell phones might disrupt communication. Adjust the keypad’s location if needed. Metal objects can also block signals. Ensure the keypad is away from metal doors or walls. Keep the keypad’s antenna free from obstructions. This ensures a clear signal path.
Maintaining Your Keypad
Maintaining your Liftmaster keypad is essential for optimal performance. Regular upkeep ensures your keypad works smoothly, providing reliable access. Simple steps can prevent issues and extend its lifespan. Let’s explore ways to care for your keypad effectively.
Regular Cleaning
Dust and dirt can affect your keypad’s functionality. Clean it regularly with a soft cloth. Avoid harsh chemicals that might damage the surface. A gentle cleaning routine helps maintain the keypad’s responsiveness. Pay attention to the buttons, as dirt can accumulate there.
Periodic Checks
Routine inspections are crucial for identifying potential issues. Check the keypad for signs of wear or damage. Ensure all buttons respond correctly when pressed. If a button feels stuck, gently press it several times. Look for loose connections or exposed wires. Address any problems promptly to avoid further complications.
Frequently Asked Questions
How Do I Reset The Code On My Liftmaster Keypad?
Press the “Learn” button on the motor unit. Enter a new code on the keypad. Press “Enter” to confirm.
How Do I Reprogram My Liftmaster Garage Door Keypad?
Press “Learn” button on the motor unit. Enter new code on the keypad. Press and hold “Enter” until light blinks.
How Do I Reset My Garage Door Opener Keypad?
Press the “Learn” button on the garage door opener. Enter a new PIN on the keypad. Press “Enter” to reset.
How Do I Reset My Liftmaster Control Panel?
Press the “Learn” button on your LiftMaster control panel. Hold until the light goes out. Release to reset.
How Do I Reset My Liftmaster Keypad?
Locate the “Learn” button on your garage opener. Press it. Then, enter a new PIN on the keypad.
Conclusion
Resetting a Liftmaster keypad is simple with the right steps. Follow each step carefully to ensure success. Remember to check the battery if issues persist. A working keypad makes accessing your garage convenient. No need for complicated tools or expert help.
Just patience and attention to detail. Safety comes first, so ensure everything is secure after resetting. This guide helps you regain control over your garage access. With practice, resetting becomes even easier. Enjoy the ease and security of a well-functioning keypad.
Now, you’re ready to manage your garage effortlessly.