
Are you looking to transform your home with natural light while ensuring it’s protected from the elements? Installing skylight flashing might just be the perfect solution for you.
Skylight flashing not only enhances the aesthetic appeal of your space but also plays a crucial role in preventing leaks and water damage. However, the installation process can seem daunting if you’re not familiar with it. But don’t worry! In this guide, we’ll walk you through the steps to successfully install skylight flashing, making sure your home stays bright and dry.
With clear instructions and helpful tips, you’ll gain the confidence to tackle this project on your own. So, if you’re ready to let the sunshine in without the stress of leaks, keep reading to learn how to install skylight flashing the right way.
Choosing The Right Skylight Flashing
Installing skylight flashing prevents leaks and protects your roof. First, measure the skylight opening accurately. Then, select flashing that fits well around the skylight edges. Finally, ensure all seams are sealed tightly to keep water out. Proper installation can extend your skylight’s lifespan and maintain your home’s comfort.
Installing skylight flashing can seem daunting, but choosing the right one is crucial for a successful installation. The correct skylight flashing not only ensures your skylight is watertight but also enhances the longevity of your roof. Before you dive into installation, it’s essential to understand what type of flashing will work best for your specific needs.
Types Of Flashing Materials
Different materials serve different purposes and have unique benefits. Aluminum and galvanized steel are popular choices due to their durability and resistance to weather conditions. Plastic flashing is lightweight and easy to install but may not offer the same longevity. Copper flashing is a premium option known for its strength and aesthetic appeal. It’s more expensive but can last decades with minimal maintenance. Consider the climate you live in; for example, if you experience harsh weather, investing in a stronger material could save you time and money in the long run.
Compatibility With Skylight Models
Not all flashing materials work with every skylight model. Some skylights come with specific flashing kits designed to fit them perfectly. This ensures optimal performance and reduces the risk of leaks. Always check the manufacturer’s specifications for your skylight model. Are there recommended materials or kits? Sometimes, using non-compatible flashing can void the warranty. Remember that choosing the right flashing is as much about protecting your investment as it is about performance. Have you ever installed a skylight only to encounter leaks? It might have been due to incompatible flashing. Learning from past experiences can guide your future projects. Investing time in researching compatibility can make a world of difference in your installation success.
Preparing For Installation
Installing skylight flashing requires careful preparation. This step ensures a smooth installation process. Proper preparation prevents common issues later. It sets the foundation for durable skylight flashing.
Begin by understanding the tools needed. Safety is also crucial. Address both aspects before starting the installation.
Gathering Necessary Tools
Collect all required tools in advance. Essential tools include a tape measure, utility knife, and ladder. You’ll also need a hammer, nails, and flashing materials. Having these ready saves time and prevents delays.
Inspect tools for damage. Replace faulty tools before use. Ensure they are within reach during installation. Proper tools make the task efficient.
Safety Precautions
Safety should be your top priority. Wear gloves to protect your hands. Safety goggles shield your eyes from debris. Non-slip shoes ensure stability on the roof.
Secure the ladder properly. Double-check its placement before climbing. Avoid working during adverse weather. Wet conditions increase risks significantly.
Inform someone nearby about the installation. This adds an extra layer of safety. Having assistance can be beneficial in case of emergencies.
Measuring And Marking
Measuring and marking are crucial steps in installing skylight flashing. Proper measurements ensure a snug fit and weatherproof installation. Precise marking guides the placement and alignment of the skylight. Follow these steps to achieve accuracy and efficiency.
Accurate Measurement Techniques
Start by gathering necessary tools like a tape measure and pencil. Measure the skylight dimensions precisely. Record each measurement carefully. Double-check to avoid errors. Use a ruler for straight lines and tape measure for length. Measure twice to ensure accuracy.
Assess the roof pitch and angle. This affects skylight fit and flashing. Calculate measurements considering the roof slope. Consider potential obstructions like beams or vents. Ensure measurements account for these factors. Accurate measurements prevent future issues.
Marking The Roof
Begin marking the roof using a pencil. Outline the skylight area based on measurements. Mark clearly to avoid confusion. Use a level to ensure straight lines. Double-check your markings for precision.
Consider the flashing layout. Mark areas where flashing will sit. Ensure markings align with skylight dimensions. Mark any necessary adjustments. These markings guide the installation process. Accurate markings make installation smoother and more efficient.
How to Install Skylight Flashing [Here is Installing The Flashing]
Learn to install skylight flashing with ease. Start by gathering tools like a hammer and screwdriver. Ensure a waterproof seal to keep rain out. Secure the flashing tightly around the skylight. Follow safety precautions on the roof. Enjoy natural light without leaks.
Installing the flashing for your skylight is a crucial step to ensure a weather-tight seal. Proper installation prevents leaks and extends the lifespan of your skylight. Let’s walk through the steps of positioning and securing the flashing for optimal results.
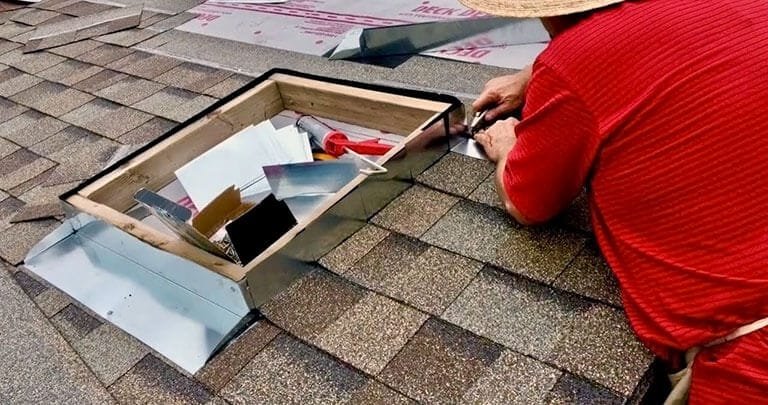
Positioning The Flashing
Start by carefully unpacking your flashing kit. Lay out all the pieces to ensure you have everything needed. This preparation saves you from interruptions later. Place the bottom flashing piece first, aligning it with the lower edge of the skylight. This piece acts as the primary barrier against water intrusion. Check that it sits flush against the roof and skylight base. Next, position the side flashing pieces. Slide them under the shingles and overlap them with the bottom piece. This overlap is crucial for directing water away from the roof. Have you ever tried arranging puzzle pieces? It’s similar here—everything has its place.
Securing The Flashing
Once positioned, it’s time to secure the flashing. Use roofing nails to fasten the bottom piece. Ensure the nails penetrate the roof decking for a strong hold. For the side pieces, lift the shingles slightly and nail down the flashing. Be cautious not to damage the shingles. This step ensures the flashing remains hidden and protected. Lastly, install the top flashing. Slide it under the shingles and over the side pieces. It should overlap the side pieces for maximum protection. Have you noticed how a well-tucked blanket feels snug? That’s the level of security you’re aiming for. Remember, each step in securing the flashing is vital for preventing leaks. If you rush, you might miss a crucial detail. Take your time and double-check each nail and overlap. Are you confident in your work? If not, revisit any step that feels unsure. Proper flashing installation not only protects your home but also enhances your skylight experience. Are you ready to enjoy the benefits of a well-installed skylight?
Sealing And Waterproofing
Sealing and waterproofing are crucial steps in skylight installation. Proper sealing prevents leaks and protects your home from water damage. This section guides you through applying sealant and ensuring waterproof integrity.
Applying Sealant
Start by cleaning the skylight’s surface. Remove any dirt or debris. Ensure the surface is dry before application. Choose a high-quality sealant designed for skylights. Apply the sealant evenly around the skylight’s edges. Use a caulking gun for precise application. Avoid gaps or air pockets in the sealant. Let the sealant cure as per manufacturer’s instructions. This ensures a strong bond.
Ensuring Waterproof Integrity
Check the flashing installation thoroughly. Inspect for any gaps or misalignments. Confirm the flashing overlaps properly. This prevents water from seeping underneath. Test the waterproof integrity by spraying water. Observe any leaks or weak spots. Reapply sealant if necessary. Use additional waterproofing materials if needed. Ensure all seams are sealed tight. Regular maintenance will keep your skylight leak-free. Always address any issues promptly to maintain waterproof integrity.
Testing For Leaks
Ensuring proper installation of skylight flashing involves checking for leaks. It prevents water damage and maintains indoor comfort. Use reliable methods to detect leaks early, ensuring a watertight seal around the skylight.
Installing skylight flashing is a crucial process, but ensuring it’s leak-proof is where the real challenge lies. Once the installation is complete, testing for leaks becomes your next critical step. Imagine waking up to a rainy morning only to find drops of water seeping through your freshly installed skylight. Testing for leaks beforehand can save you from potential headaches and costly repairs. Let’s dive into how you can conduct these tests effectively.
Conducting Water Tests
A water test is your first line of defense against leaks. Use a garden hose to simulate rain by spraying water over the skylight. Focus on the edges where the flashing meets the roof and the skylight frame. Observe closely for any signs of water penetration. If you spot water inside, it’s a clear indicator that adjustments are needed. Have a friend assist you by inspecting the interior while you spray water from outside.
Checking For Air Leaks
Air leaks might not be as obvious as water leaks, but they can cause significant energy loss. On a windy day, stand close to the skylight and feel around the edges for drafts. You can also use a candle or a piece of tissue paper to detect air movement. If the flame flickers or the paper moves, you’ve got an air leak. Addressing air leaks promptly can improve your home’s energy efficiency. It also ensures your skylight performs optimally, providing both natural light and proper insulation. Testing for leaks isn’t just about peace of mind; it’s about protecting your investment. Have you ever tested something and found surprising results? Taking these steps ensures your skylight remains a beautiful, functional part of your home for years.
Maintenance Tips
Skylight flashing requires regular upkeep to remain effective. Neglect can lead to leaks and damage. Proper maintenance ensures your skylight serves its purpose without issues. Follow these simple tips to keep your skylight flashing in top shape.
Regular Inspection
Check your skylight flashing at least twice a year. Look for signs of wear or damage. Pay attention to any cracks or loose materials. Early detection prevents bigger problems later.
Addressing Minor Repairs
Minor issues like small cracks can be fixed easily. Use a sealant to cover cracks. Tighten any loose screws or fasteners. This stops water from seeping through.
Replace any damaged parts immediately. This prevents further damage to the skylight. Keeping a close eye on your skylight can save you from costly repairs.
Frequently Asked Questions
What Tools Do I Need For Skylight Flashing?
Basic tools include a hammer, utility knife, tape measure, and ladder. Safety gear is essential too.
How Long Does Skylight Flashing Installation Take?
Installation typically takes a few hours. Time varies based on skill and skylight size.
Can I Install Skylight Flashing Myself?
Yes, you can. With proper tools and guidance, DIY installation is possible. Consider professional help if unsure.
What Are Common Mistakes During Skylight Flashing?
Improper sealing and wrong measurements are common errors. Ensure accuracy to avoid leaks and other issues.
Does Skylight Flashing Require Maintenance?
Yes, regular checks for leaks and wear are advised. Proper maintenance ensures longevity and performance.
Conclusion
Installing skylight flashing is simple with the right steps. First, gather your materials. Next, follow the installation guide closely. Pay attention to detail to ensure no leaks. Take your time for each step. Safety comes first, so use proper equipment.
Double-check your work to guarantee a snug fit. Your skylight will bring light and energy into your space. Enjoy the natural light it provides every day. With these steps, you can complete the task confidently. Now, your skylight is ready to enhance your home.