
Are you tired of clutter taking over your space? Do you often find yourself wishing for a simple solution to organize your home or office?
If so, cubby storage shelves might be the perfect answer for you. Imagine a space where everything has its own place, where you can easily find what you need, and where you can showcase your favorite items. Building your own cubby storage shelves can transform your environment into an organized haven.
With just a few materials and some creativity, you can create shelves that not only serve a practical purpose but also add a touch of personal style to your space. Whether you’re a DIY enthusiast or a beginner looking for a manageable project, this guide will walk you through the steps to build your very own cubby storage shelves. Get ready to say goodbye to clutter and hello to an organized, stylish space that reflects your personality and meets your needs. Keep reading to discover how you can achieve this transformation today!
Materials And Tools Needed
Creating cubby storage shelves is a rewarding DIY project. It requires careful planning and the right materials. Gathering the right tools ensures a smooth building process. Here’s a detailed list of everything you need.
Materials Needed
Start with quality wood. Plywood is a popular choice. It offers strength and durability. Choose the thickness based on your needs. You will also need wood screws. They hold everything together securely. Sandpaper is crucial for a smooth finish. Use wood glue for extra strength in joints. Finally, purchase a wood finish or paint. It protects and beautifies your shelves.
Tools Required
A tape measure is vital for accurate dimensions. A saw, preferably a power saw, cuts the wood efficiently. A drill is necessary for making holes. Make sure it has the right drill bits. A screwdriver fastens screws tightly. A sander smooths out rough edges. Clamps hold pieces in place during assembly. Lastly, safety gear like goggles and gloves is essential.
Additional Supplies
Having a pencil and a straightedge helps mark your cuts. A level ensures your shelves are balanced. You may want a paintbrush for applying paint or finish. Have a clean cloth ready. It helps in wiping away dust and excess glue. These additional supplies simplify the building process.

Credit: m.youtube.com
Designing Your Cubby Shelves
Creating cubby storage shelves can be a fun project. It adds functionality to your space. Designing them requires careful planning. Think about the space where your shelves will go. Consider the purpose they will serve. This will help you make smart choices. Let’s explore how to design your perfect cubby shelves.
Choosing Dimensions
Start with measuring the area for your shelves. Decide on the height, width, and depth. Keep in mind the items you will store. Larger items need wider shelves. Smaller items fit into compact spaces. Make sure there’s enough room to move around. Your shelves should not block paths or doors.
Selecting Materials
Choose materials that match your style and budget. Wood is popular for its natural look. Metal offers durability and modern design. Plastic is lightweight and easy to clean. Think about the weight your shelves need to hold. Strong materials support heavy items better. Select a finish that fits your room’s decor.
Sketching Your Plan
Draw a simple sketch of your shelf layout. Include dimensions and materials. Visualize how it will look in your space. Use graph paper for accurate measurements. This helps you see potential issues. Make changes before building starts. A clear plan saves time and effort.
Preparing The Workspace
Building cubby storage shelves at home is exciting and rewarding. To ensure success, first prepare your workspace. This step is crucial for efficiency and safety. A well-organized area makes the process smoother. It also minimizes accidents and mistakes.
Preparation involves two main tasks. First, clear the area. Second, organize your tools. Both steps are simple yet essential.
Clearing The Area
Start by removing unnecessary items. This creates space for your materials and tools. A clutter-free area helps you focus better. It also reduces the risk of tripping over objects. Ensure the floor is clean and free from debris. Adequate lighting is also important. It prevents mistakes and ensures precision.
Organizing Tools
Gather all the tools you need for the project. Keep them within easy reach. This saves time and effort. Arrange them in order of use. This helps maintain a steady workflow. Common tools for building shelves include a saw, drill, and measuring tape. Ensure all tools are in good working condition. Check for any damages or issues beforehand. This prevents interruptions during the building process.
Credit: learn.kregtool.com
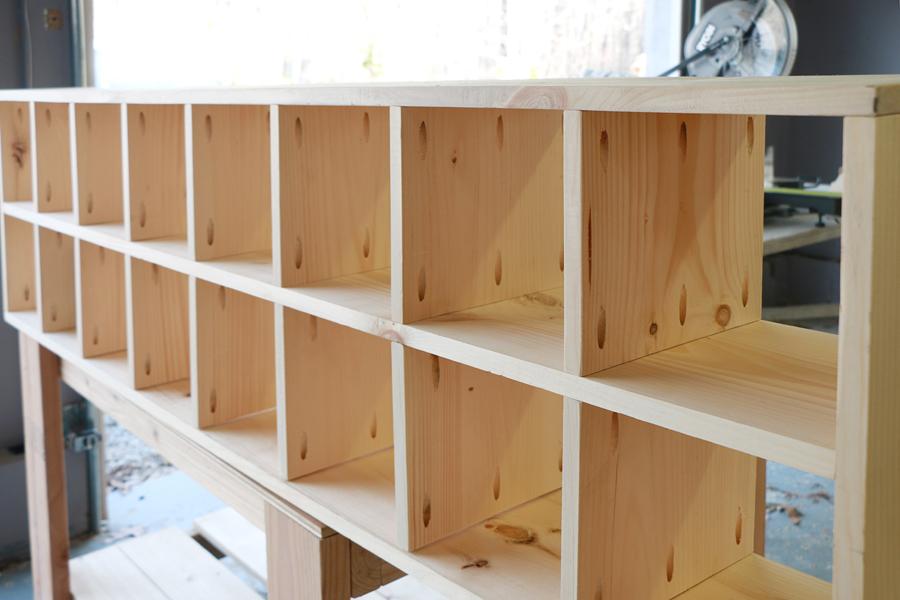
Cutting The Wood Pieces
Start by selecting quality wood for your cubby storage shelves. Cut each piece carefully to ensure perfect fit and stability. Accuracy in measurements prevents uneven shelves, ensuring a neat and organized look.
Cutting the wood pieces is a crucial step in building cubby storage shelves. It’s where precision meets creativity. Each cut needs to be exact, ensuring the pieces fit together perfectly. Whether you’re a seasoned DIY enthusiast or a beginner, mastering this step can be incredibly satisfying. Imagine standing back and admiring a piece of furniture you crafted yourself. Ready to get started? Let’s dive into the essentials of measuring, marking, and cutting your wood pieces accurately.
Measuring And Marking
Accuracy is your best friend when measuring and marking. Before you start, gather your tools: a tape measure, a pencil, and a square. Measure twice, cut once. This timeless advice will save you from potential errors. Make sure your measurements are consistent across all pieces. You don’t want one shelf longer than the others. Mark your measurements clearly. Use a sharp pencil for thin, precise lines. Consider using a square to ensure your lines are straight and accurate. This tool can be a game-changer, especially if you’re new to woodworking.
Using A Saw Safely
Safety should always be your top priority when using a saw. Wear protective eyewear to shield your eyes from sawdust and debris. Position your wood piece securely before cutting. A sturdy workbench or sawhorses will provide stability. A clamp can also help hold the wood in place, reducing the risk of slips. Understand your saw. Whether you’re using a handsaw or a power saw, familiarize yourself with its operation. Practice on scrap wood first. This will help you gain confidence and ensure your cuts are clean and precise. Are you ready to transform your raw wood into functional pieces? Remember, each cut is a step closer to your finished cubby storage shelves. Embrace the process, and enjoy the journey of creating something with your own hands.
Assembling The Frame
Building cubby storage shelves is an exciting project. Assembling the frame is where your creativity meets practicality. It’s the foundation of your storage solution, and getting it right sets the tone for the entire project.
Start by gathering your materials. You’ll need wood panels, corner brackets, and a trusty tape measure. Measure twice, cut once. This old adage is your best friend here. Cut your panels to the desired dimensions and align them carefully.
Use corner brackets to join the pieces. They provide stability and ensure your frame stands tall. Align each bracket precisely at the corners and check for any gaps. Remember, a snug fit is crucial for a sturdy frame.
Have you ever wondered why your bookshelves wobble? It’s often due to improper joining. Ensure your corners are tight, and you’ll avoid those pesky wobbles.
Next, it’s time to secure your frame with screws. Using a drill, drive screws into the corner brackets. This step is vital for reinforcing the structure.
Choose screws that match the thickness of your wood. It’s a simple detail, but it makes a big difference. Tighten each screw until it’s flush with the surface.
Have you ever experienced a shelf collapse? It’s a nightmare. Properly securing with screws prevents this. Your storage shelves will withstand weight and time with ease.
Assembling the frame is more than just putting pieces together. It’s an opportunity to create something durable and personalized. What will your shelves hold? Books, toys, or treasures? The possibilities are endless when you start with a solid frame.
Adding The Shelves
Building cubby storage shelves can simplify organizing. Start by measuring the space and gathering materials like wood and screws. Follow clear instructions to assemble, ensuring each cubby fits perfectly.
Adding shelves to your cubby storage unit is where the real magic happens. This is the stage where you see your vision come to life. It’s all about turning a basic frame into a functional piece that organizes your space. You’ll want to get this right to ensure the shelves are both practical and stable. Let’s dive into the details of adding your shelves.
Positioning Shelves
Positioning shelves might seem straightforward, but there’s an art to it. Start by deciding the purpose of each cubby. Are you storing books, toys, or decor? This choice dictates the height and spacing of your shelves. Measure twice before drilling. A minor misstep can lead to a lopsided shelf. Use a spirit level to ensure even placement. This tool is a game changer for avoiding tilted shelves. Consider adjustable shelving. It allows flexibility for future needs. Imagine how nice it would be to move a shelf up or down without having to start from scratch!
Ensuring Stability
Stability is crucial when adding shelves. You want them to hold your items without any wobble. Use sturdy brackets to support the weight. Cheap materials might save money now, but could cost more if a shelf collapses. Secure each shelf with screws that are long enough to anchor into the cubby’s framework. This is where you don’t want to cut corners. Test the stability by gently placing weight on the shelves. Does it hold firm or sway slightly? A stable shelf gives you confidence that your valuables are safe. Have you ever had a shelf come crashing down? It’s not just an inconvenience—it’s a wake-up call to prioritize stability. By being mindful of how you position and stabilize your shelves, you ensure your cubby storage not only looks good but performs well too.
Finishing Touches
Crafting cubby storage shelves involves selecting the right materials and tools. Begin with precise measurements to ensure a perfect fit. Secure shelves with screws and brackets for stability, and apply a finish for durability and aesthetic appeal.
Adding the finishing touches to your cubby storage shelves can make all the difference in transforming them from a basic project to a professional-looking piece of furniture. This stage is about giving your shelves that polished, complete look. It’s where your creativity can shine, and your efforts come to life.
Sanding The Surfaces
Before you apply any finish, ensure that the surfaces of your shelves are smooth. Sanding is crucial as it removes rough spots and helps the finish stick better. Use a medium-grit sandpaper for the initial sanding to smooth out any imperfections. Follow this with a fine-grit sandpaper to achieve a silky surface. Pay attention to edges and corners. They should be rounded slightly to avoid sharpness, which can be both unsightly and hazardous.
Applying Paint Or Varnish
Deciding between paint or varnish depends on the look you want and the function of the shelves. Paint can add a pop of color and hide imperfections, while varnish highlights the wood grain and adds durability. If you choose paint, apply a primer first. It helps in achieving an even color and ensures the paint adheres properly. Opt for a water-based varnish for easy cleanup and a quick-drying finish. Apply with a brush or roller in thin layers, allowing each coat to dry before adding the next. Consider your room’s decor. Would a bold color make your shelves stand out, or would a natural wood finish complement your existing furniture? Remember, each layer of finish adds depth and protection. Be patient and let the process unfold. Have you ever noticed how a simple coat of paint can completely change the vibe of a room? Try experimenting with different finishes on a scrap piece of wood before committing. Your cubby storage shelves are more than just a storage solution; they’re a reflection of your style. What will you choose to say with your finishing touches?
Installing In Your Space
Installing cubby storage shelves in your space can transform how you organize your home or office. The right installation not only adds functionality but also enhances the aesthetic appeal of your room. This section will guide you through the simple yet crucial steps to ensure your cubby shelves are installed effectively.
Choosing A Location
Start by identifying a location that maximizes the use of your cubby shelves. Consider spaces that often become cluttered, like the entryway or living room. Ask yourself: Where do you need more organization?
Measure the area to ensure your shelves fit perfectly. You don’t want to end up with shelves that overpower your space or look awkwardly small. Visualize how the shelves will look there; sometimes, moving a piece of furniture can open up possibilities.
Securing To The Wall
Securing your cubby shelves to the wall is essential for safety and stability. Use wall anchors or studs to provide strong support, especially if you plan to store heavy items.
Gather the right tools: a drill, level, and screws. With these, you can ensure the shelves are mounted straight and steady. Have you ever tried to hang a picture crooked? Imagine that with shelves—it’s frustrating!
Double-check the height at which you’re installing them. You want them to be accessible yet not obstructive. Consider how different family members or coworkers will use them. Could too high or too low become a problem?
By choosing the right location and securing them well, your cubby storage shelves will serve you efficiently and stylishly. Take the time to plan, and you’ll enjoy a clutter-free space that’s both functional and inviting.
Organizing Your Items
Organizing your items on cubby storage shelves can be a rewarding task that not only clears clutter but also enhances the functionality of your space. By taking the time to sort and arrange your possessions, you can make your home more efficient and visually appealing. Whether it’s a child’s playroom, a home office, or a kitchen pantry, cubby storage shelves offer a versatile solution for keeping things tidy and accessible.
Categorizing Possessions
The first step to a well-organized cubby system is categorizing your items. Start by grouping similar items together. Think about how you use your items and how often you need them.
Consider creating categories like books, office supplies, toys, or kitchen utensils. This makes it easier to find what you need without sifting through unnecessary clutter. You might be surprised at how much easier your daily routines become.
Labeling is your best friend here. Use clear labels that are easy to read. This is not just for you but also for family members who need to find things quickly. It’s amazing how a simple label can save you minutes every day.
Maximizing Storage
Once you’ve categorized, it’s time to think about maximizing your storage space. Think vertically and use every inch of space available. Shelves can be adjusted to fit larger or smaller items, making them highly adaptable.
Consider using baskets or bins for smaller items that might otherwise get lost. This not only keeps your cubbies tidy but also adds a layer of aesthetic appeal. You can even color-coordinate these containers to match your room’s decor.
Evaluate how often you use each item. Store frequently used items within easy reach while placing less-used items higher or lower. This small adjustment can make a big difference in the flow of your space.
Finally, regularly reassess your storage needs. As seasons change or life evolves, your storage needs will too. Schedule a quick audit every few months to keep your system efficient. Are there items you haven’t used in a while that could be stored elsewhere or donated?
Organizing your cubby storage shelves is not just about tidying up—it’s about enhancing your daily life. With a little effort and creativity, you can transform your space into a haven of order and efficiency.
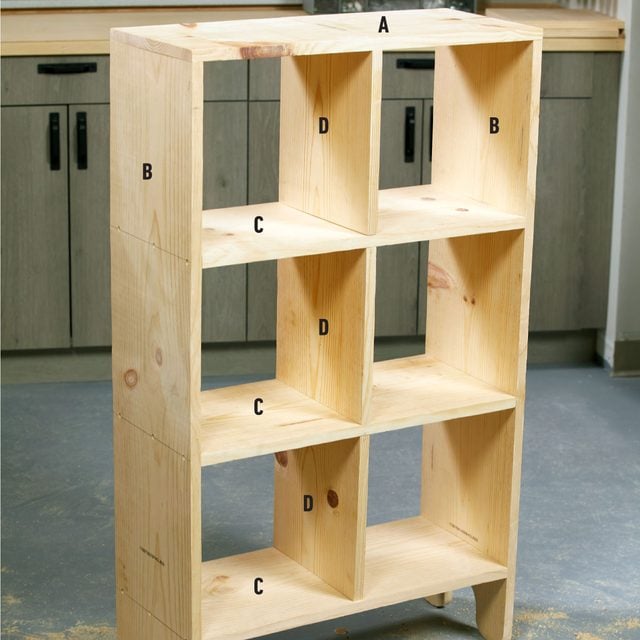
Credit: www.familyhandyman.com
Frequently Asked Questions
What Materials Do I Need For Cubby Shelves?
You will need wood, screws, brackets, and a saw. Also, a drill and measuring tape.
How Do I Measure For Cubby Shelves?
Measure the space where shelves will go. Include height, width, and depth measurements.
Can I Build Cubby Shelves Without Power Tools?
Yes, you can use hand tools like a handsaw and screwdriver. It takes more time.
How Do I Ensure Shelves Are Level?
Use a level tool during installation. Adjust brackets or supports as needed.
What Finish Should I Use For Wood Cubby Shelves?
Use paint or wood stain for a nice finish. Sealant can protect wood.
Conclusion
Building cubby storage shelves is a rewarding project. It adds style and organization to any space. With basic tools and materials, you can create functional storage. Customizing your shelves allows a personal touch. Choose colors and sizes that fit your needs.
Follow each step carefully for the best results. Remember, practice makes perfect. Don’t rush through the process. Enjoy the satisfaction of your DIY success. Now, your room has more space and charm. Happy building!