
Are you tired of searching through endless drawers and shelves, trying to find what you need? Imagine the joy of a perfectly organized home or office, where everything is labeled neatly and clearly.
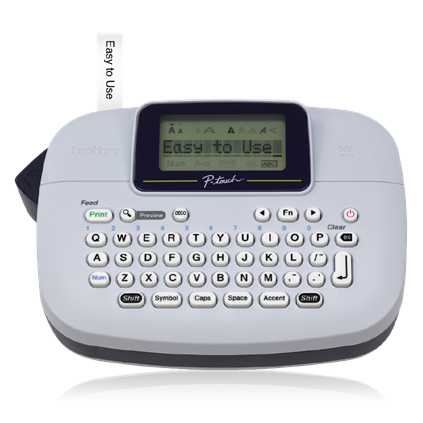
With the Brother Label Maker PT-M95, this dream can become your reality. This handy device is your ticket to a clutter-free environment, ensuring that you can locate your items with ease and efficiency. But, let’s be honest—figuring out how to use new gadgets can be a little daunting.
That’s why we’re here to guide you through the instructions step-by-step, making sure you get the most out of your label maker without any hassle. Say goodbye to confusion and hello to organization. Dive into our guide and discover how this small tool can make a big difference in your everyday life. Ready to transform your space? Let’s get started!
Credit: www.brother-usa.com
Getting Started
Starting with your Brother Label Maker PT-M95 is easy. This versatile tool helps organize your space efficiently. Follow the steps to set up your label maker quickly.
Unboxing The Label Maker
Open the box carefully to reveal the label maker. Inside, find the PT-M95 unit, tape cassette, and batteries. Check if the manual is included for detailed instructions. Make sure all components are present before beginning.
Understanding The Key Features
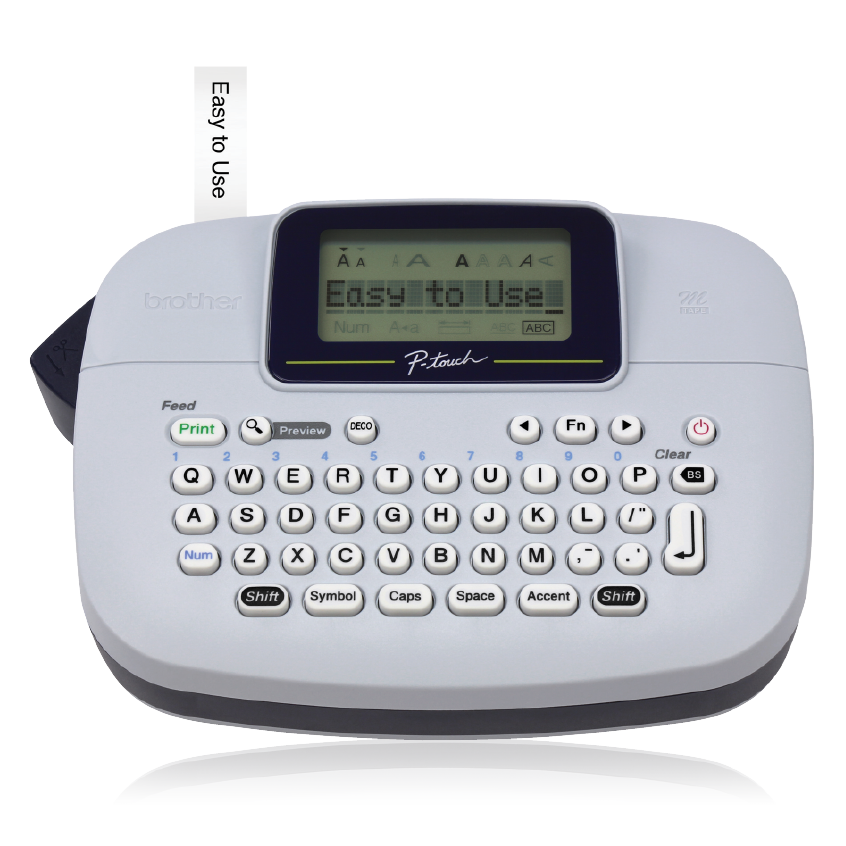
The PT-M95 offers user-friendly features for convenient labeling. It includes a compact design for easy handling. The LCD screen displays text clearly, simplifying label creation.
Explore the variety of fonts and styles available. This enhances customization options for personal or professional use. The memory function saves frequently used labels for quick access.
The label maker operates with batteries, ensuring portability. Replace them easily to keep your device ready for use. Understand these features to maximize the functionality of your label maker.
Powering Up
Explore the Brother Label Maker Pt M95 for effortless labeling. Clear instructions guide you to create neat, personalized labels quickly. Simplify organization with this easy-to-use tool.
Powering up your Brother Label Maker Pt M95 is the first step toward transforming chaos into order. Whether you’re organizing your home or office, this handy device becomes an essential ally. But before you start labeling everything in sight, let’s ensure your label maker is ready to go. Powering up might seem straightforward, but knowing your options can save you time and frustration. Are you ready to see how easy it is?
Inserting Batteries
The Brother Label Maker Pt M95 relies on batteries for its operation. You’ll need four AAA batteries, which are easy to find at your local store. To insert them, open the battery compartment at the back of the device. Make sure you follow the ‘+’ and ‘-‘ signs inside to ensure correct placement. Once the batteries are in, close the compartment securely. It’s crucial to use new batteries to avoid unexpected shutdowns. Have you ever been in the middle of a project only for your device to die? Keep spare batteries handy to avoid this hiccup.
Alternative Power Options
Not a fan of batteries? You have other choices. Consider using a compatible AC adapter for continuous power without the worry of running out of juice. This option is particularly useful if your label maker sees heavy use or stays in a fixed location. Just connect the adapter to the power port and plug it into a wall outlet. It’s a convenient solution that ensures you’re always ready to label. Plus, it saves money in the long run. Wouldn’t it be great to label without constantly buying batteries? Powering up is simple, yet understanding your options makes it seamless. Whether you choose batteries or an AC adapter, you’re set to embark on a labeling spree. So, which power option suits your needs best?
Loading The Tape
Loading the tape into the Brother Label Maker Pt M95 is simple. Start by opening the compartment and placing the tape inside. Ensure the tape is aligned properly before closing the lid, allowing for smooth operation.
Loading the tape into your Brother Label Maker Pt M95 is an essential step. It ensures your device prints labels smoothly. This guide will help you load the tape correctly. Follow each step carefully to avoid mishaps.
Choosing The Right Tape
Selecting the proper tape is crucial. Different tapes suit different tasks. Consider the label size you need. Ensure the tape is compatible with the Pt M95. Check the tape type for durability. Some tapes withstand heat or moisture. Choose wisely based on your labeling needs.
Installing The Tape Cassette
Start by opening the tape compartment. Locate the release button. Press gently to open the compartment. Remove any empty cassette. Place the new tape cassette inside. Ensure the tape feeds correctly. Align the tape with the guides. Close the compartment securely. Test by printing a label. Ensure it prints smoothly.
Credit: www.brother-usa.com
Basic Operations
Brother Label Maker Pt M95 simplifies basic operations with clear, step-by-step instructions. Easily create labels using the intuitive keyboard and display. Customize your labels with various fonts and styles for efficient organization.
Understanding the basic operations of your Brother Label Maker Pt M95 is crucial for creating neat and professional labels effortlessly. Whether you’re a beginner or just looking for a quick refresher, mastering these operations can make your labeling tasks smoother and more efficient. Let’s dive into two fundamental aspects that will get you started on the right foot.
Turning On The Device
To power up your Brother Label Maker Pt M95, locate the power button on the device. It’s usually positioned on the side or the top, making it easy to spot. Press and hold this button for a second until the screen lights up, indicating that your label maker is ready for action. If you find that your device doesn’t turn on, ensure that the batteries are correctly inserted or that the power adapter is securely connected. Remember, a simple press and hold can be the difference between frustration and functionality.
Navigating The Menu
Navigating the menu of the Brother Label Maker Pt M95 is akin to exploring a treasure trove of features. Once the device is on, use the arrow keys to scroll through the options displayed on the screen. You’ll find settings for font size, style, and even decorative frames. Select your desired feature by pressing the ‘OK’ button. For instance, if you want to change the font size, scroll until you see the ‘Size’ option, press ‘OK’, and then choose from small, medium, or large sizes. This straightforward menu navigation allows you to customize your labels according to your needs, ensuring every label is both functional and aesthetically pleasing. Have you ever considered how much a well-organized label can save you time in a hectic workspace? With these basic operations at your fingertips, you’re well-equipped to create labels that meet your exact requirements. Whether you’re labeling files, pantry items, or personal belongings, the Brother Label Maker Pt M95 is your trusty companion.
Creating Labels
Brother Label Maker Pt M95 offers simple steps for creating clear labels. Insert label tape and power on the device. Use the keyboard to type your desired text and press print. Adjust label length as needed with easy navigation buttons.
Perfect for organizing home or office items efficiently.
Creating labels with the Brother Label Maker Pt M95 is simple and fun. This handy device helps you organize your home, office, or classroom. You can quickly create labels for files, containers, or shelves. Follow these easy steps to make perfect labels every time.
Typing Text
Start by turning on your label maker. Use the keypad to enter your text. The keypad works like a computer keyboard. You can type letters, numbers, and symbols. Make sure your text is correct before moving on. Use the backspace button to correct mistakes.
Formatting Options
Formatting your label makes it look great. You can choose different font styles and sizes. The label maker offers bold, italic, and underline options. Adjust the text alignment for a neat appearance. Add frames to make your labels stand out. Use the format button to access these features.
Previewing The Label
Preview your label before printing. This step helps you avoid errors. Press the preview button to see your label on the screen. Check the text and formatting. Make sure everything looks right. If needed, go back and make changes. Once satisfied, you can print your label.
Printing Labels
Printing labels with the Brother Label Maker PT-M95 is straightforward. This device offers flexibility and precision. Users can create labels for various needs. Whether organizing files or personalizing items, this tool helps. Follow the steps below to ensure effective label printing.
Adjusting Print Settings
First, turn on the label maker. Next, select the “Menu” button. Use the arrow keys to navigate options. Choose “Print Settings” from the menu. Here, adjust the label length. Set the desired margin size too. This ensures labels fit perfectly. Confirm your settings by pressing “OK”.
Executing The Print Command
Once settings are adjusted, enter your label text. Use the keyboard for this. Double-check for errors. Press the “Print” button to proceed. The label maker will start printing. Wait until the label is fully printed. Carefully remove the label. Your custom label is now ready to use.
Maintenance Tips
Keep your Brother Label Maker Pt M95 in top shape with simple maintenance. Regularly clean the print head and replace worn-out tape. Ensure all parts are securely attached for smooth operation.
Maintaining your Brother Label Maker PT-M95 ensures it runs smoothly and lasts longer. Regular upkeep can save you time and money in the long run. Let’s dive into some essential maintenance tips to keep your device in top shape.
Cleaning The Device
Keeping your label maker clean is crucial for optimal performance. Dust and debris can accumulate, affecting print quality. Use a soft, lint-free cloth slightly dampened with water to wipe the exterior. Avoid using harsh chemicals, which can damage the plastic casing. Don’t forget the print head. A cotton swab with a bit of isopropyl alcohol can gently clean it. This quick habit ensures your labels are always crisp and clear.
Replacing The Tape
Running out of tape mid-project can be frustrating. Knowing how to replace it quickly is a lifesaver. First, open the tape compartment by pressing the release button. Gently lift the old tape out and set it aside. Insert the new tape, making sure it’s aligned correctly. Close the compartment and print a test label. It’s that easy, and you’re back in action. Have you ever found yourself stuck because you didn’t have spare tape? Always keep an extra roll handy to avoid unnecessary interruptions.
Regular maintenance not only preserves your device but also enhances your productivity. What maintenance routine will you adopt to keep your label maker in prime condition?
Credit: www.ptouchdirect.com
Troubleshooting
Brother Label Maker Instructions Pt M95 simplify troubleshooting with clear, step-by-step guidance. Quickly fix common issues with easy-to-follow solutions designed for efficient label creation. Enhance productivity by understanding the straightforward instructions tailored for everyday use.
Troubleshooting your Brother Label Maker Pt M95 can save you from a lot of headaches. You might be in the middle of organizing your home or office when suddenly, the label maker stops working as expected. Don’t worry; you’re not alone. By understanding common issues and knowing how to address them, you can keep your label maker running smoothly and efficiently.
Common Issues
You might encounter some typical problems with your Brother Label Maker Pt M95. One frequent issue is the device not turning on. Make sure the batteries are correctly installed and have enough power. If the screen is still blank, try replacing the batteries with new ones. Label jamming is another hassle. This can happen if the tape cassette is not inserted properly. Open the cover, remove the cassette, and reinsert it carefully. Ensure there are no obstructions in the tape path. Sometimes, the printed labels might appear faint or incomplete. This might be due to the print head being dirty. Gently clean the print head with a soft cloth dipped in isopropyl alcohol. Allow it to dry before trying to print again.
Contacting Support
If you’re still facing issues despite your troubleshooting efforts, contacting Brother support might be the next step. They have a dedicated team ready to assist you with more complex problems. Before reaching out, gather essential information. Note down the model number, a brief description of the issue, and any troubleshooting steps you’ve already taken. This will help the support team diagnose the problem quicker. You can contact Brother support through their website or phone. They often provide FAQs and user guides online, which can be incredibly helpful. Remember, reaching out for help is not a sign of defeat—it’s a step toward a solution. Have you ever had to troubleshoot a gadget and found an unexpected solution? Share your experiences in the comments and let’s help each other out!
Frequently Asked Questions
How Do I Turn On The Brother Label Maker?
Press the power button. It is located on the top right of the device.
How Can I Change The Label Tape?
Open the tape compartment. Remove the old tape. Insert new tape. Close the compartment.
What Should I Do If The Label Maker Jams?
Turn off the device. Open the tape compartment. Remove any stuck tape. Close and restart.
How Do I Adjust The Label Font Size?
Press the “Font” button. Choose the desired size using the arrow keys. Press “OK” to confirm.
Why Is My Label Not Printing Clearly?
Check if the tape is installed correctly. Clean the print head gently. Replace if necessary.
Conclusion
Mastering the Brother Label Maker PT-M95 is simple. Follow instructions carefully. You’ll create labels swiftly. This tool enhances organization and saves time. With practice, label making becomes second nature. The PT-M95 is reliable and easy to use. It’s perfect for home or office needs.
Now, label your items with confidence. Get creative with your designs. Enjoy the neatness it brings. This label maker is a handy addition to any space. Dive into labeling and see the difference. Organize efficiently and effortlessly. Happy labeling!