
Is your dryer leaving your clothes damp or overheating them? If so, your dryer’s moisture sensor might be the culprit.
This small, often overlooked component plays a big role in making sure your laundry comes out perfectly dry every time. When it malfunctions, you may notice inconsistent drying cycles, longer drying times, or even no heat at all. Don’t let a faulty moisture sensor ruin your laundry routine.
You’ll discover the common problems with dryer moisture sensors, how to spot the signs, and simple steps you can take to test, clean, or replace it yourself. Keep reading to save time, energy, and avoid costly repairs.
Common Sensor Issues
Dryer moisture sensors help stop the dryer at the right time. They detect if clothes are dry or still wet. Problems with these sensors cause many drying issues. Knowing common sensor issues helps fix problems fast.
Inconsistent Drying
Clothes may come out damp sometimes. Other times, they might feel dry. The sensor can give mixed signals. Dirt or residue on sensor bars often causes this. Cleaning the sensors regularly helps maintain accuracy.
Over-drying Clothes
Some dryers run too long and over-dry clothes. This wastes energy and can damage fabrics. A faulty sensor might not detect moisture correctly. The dryer keeps running even when clothes are dry. Replacing the sensor often solves this issue.
Erratic Timer Behavior
The timer may stop or start randomly. It might skip or extend drying cycles. This happens when the sensor sends wrong information. The dryer tries to adjust based on sensor data. Faulty sensors confuse the timer’s signals.
No Heating Problems
Sometimes, the dryer runs but no heat comes out. The sensor could wrongly tell the machine clothes are dry. The heating element stays off because the sensor signals cycle end. Testing the sensor helps find this hidden issue.
Locating Sensor Bars
Sensor bars are key parts of a dryer’s moisture sensor system. They detect moisture in clothes and help stop the dryer at the right time.
Finding these bars is the first step in checking or fixing sensor problems. Knowing their exact location helps you clean or test them easily.
Sensor Placement In Drum
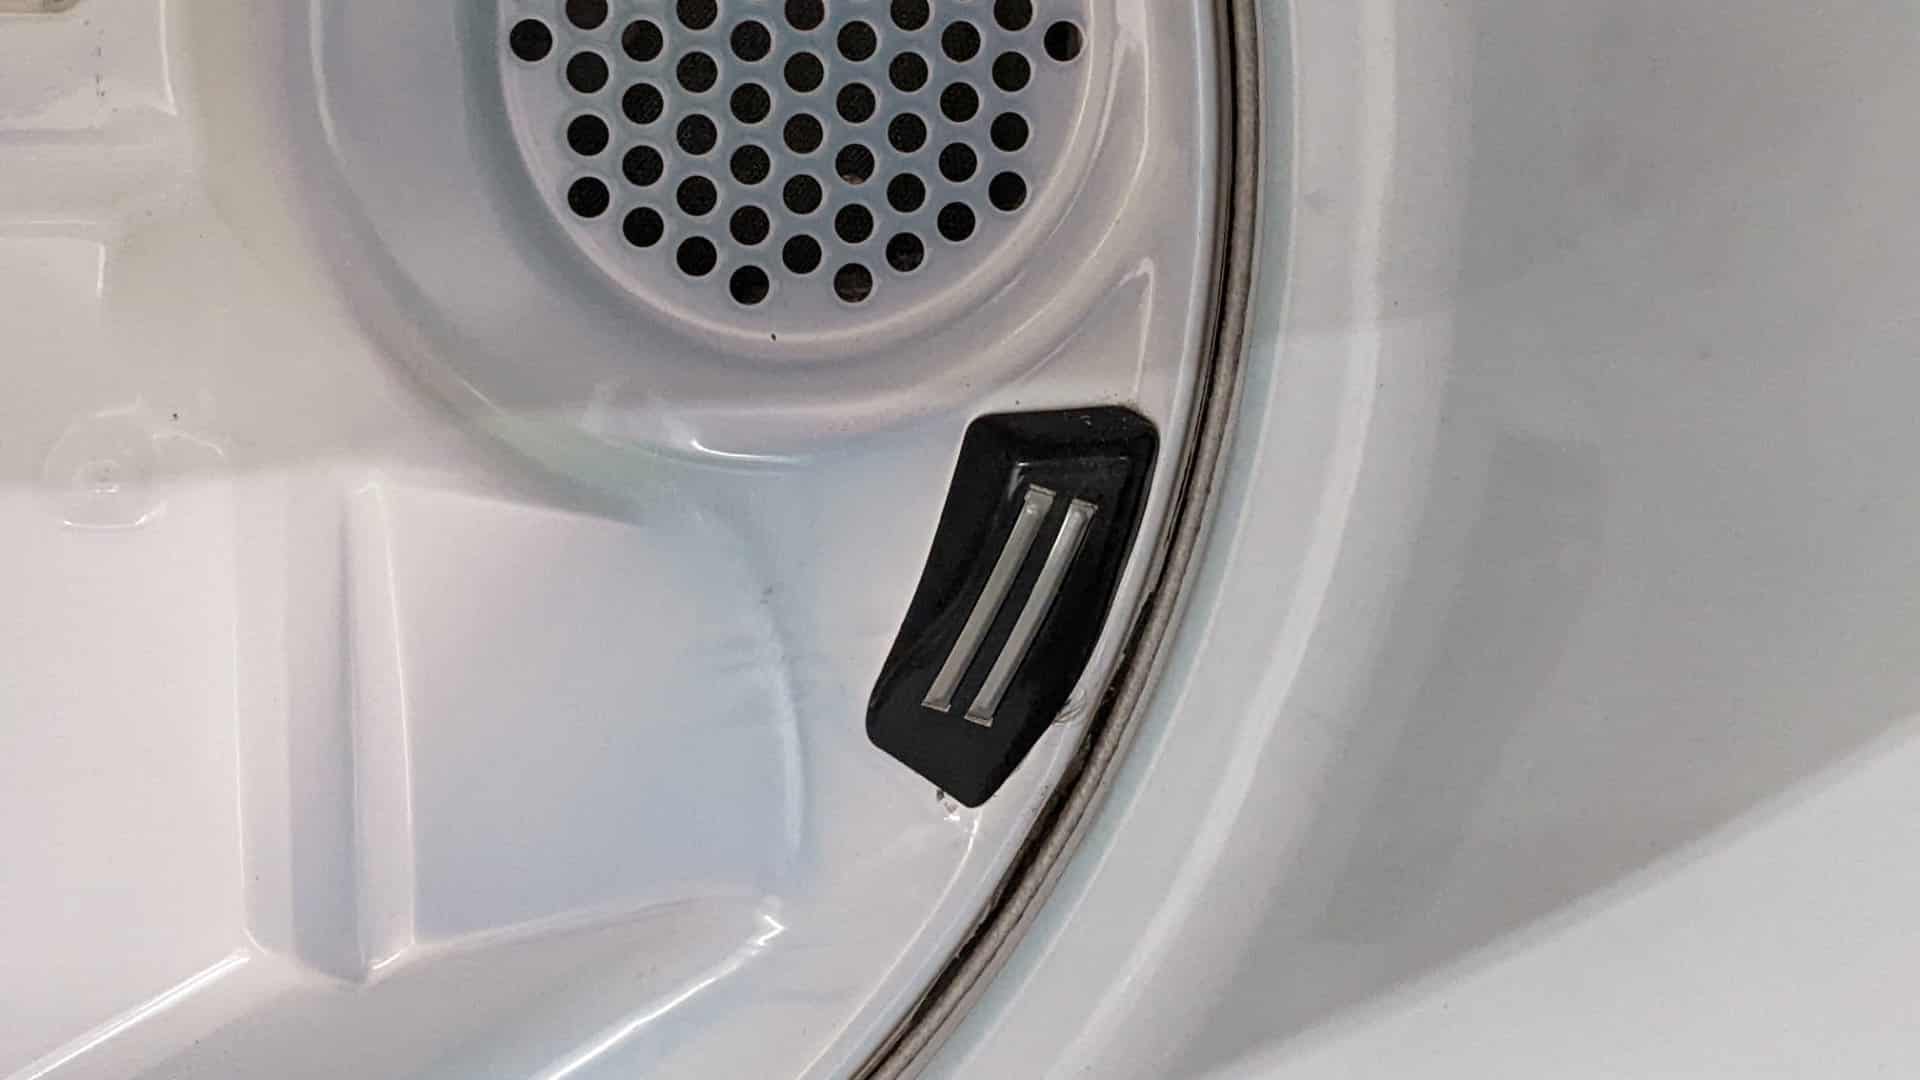
Sensor bars sit inside the dryer drum. Usually, they are near the dryer door opening. This spot lets them touch wet clothes during the cycle.
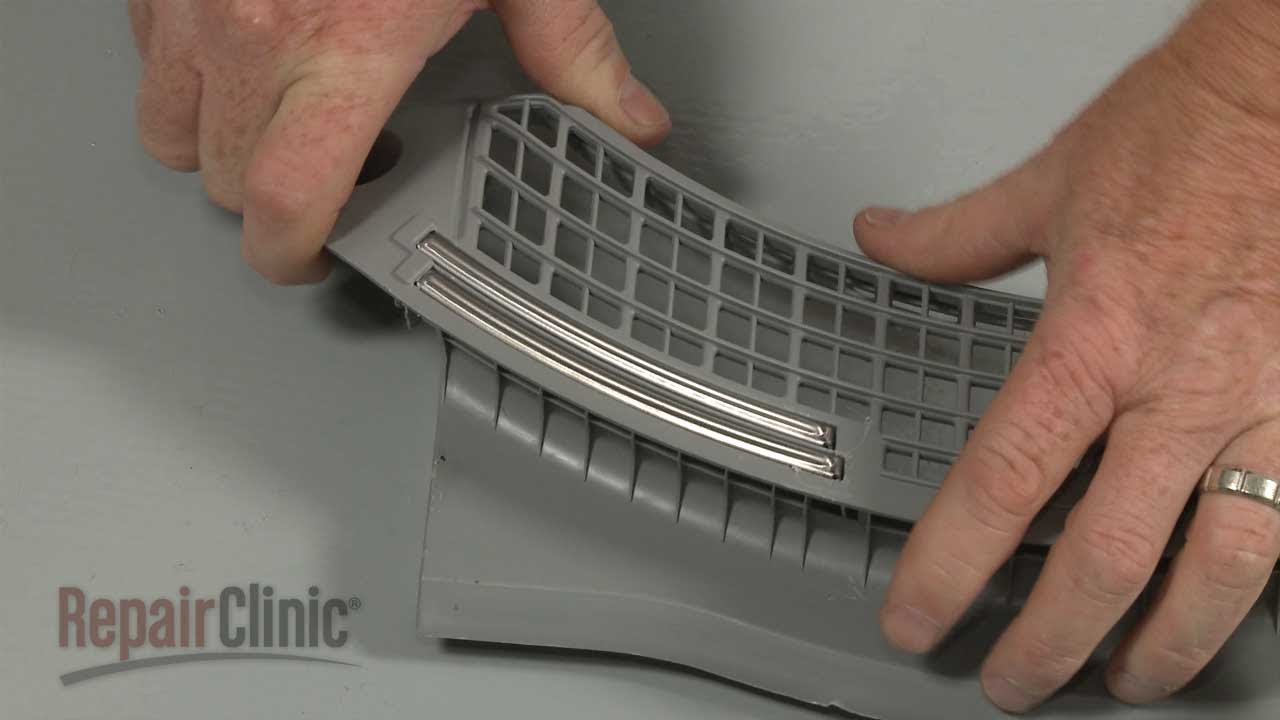
They often appear as two thin metal strips. These strips run parallel to each other on the drum wall. Their position helps measure moisture accurately.
Visual Identification Tips
Look for shiny metal strips inside the drum. They are smooth and flat, different from the drum’s rougher surface. Dirt or residue may cover them, so cleaning helps.
Sensor bars are smaller than drum ribs and placed close together. They do not spin with the drum but stay fixed in place. Spotting them is easier with good lighting.
Cleaning Sensor Bars
Cleaning sensor bars is a simple yet crucial step to fix dryer moisture sensor problems. Dirt and residue build-up on the bars can stop the sensor from detecting moisture correctly. This causes clothes to dry unevenly or take longer than usual. Regular cleaning helps the dryer work efficiently and saves energy.
Tools Needed
- Soft cloth or sponge
- Mild dish soap
- White vinegar or rubbing alcohol
- Small bowl
- Water
- Dry towel
Step-by-step Cleaning
- Unplug the dryer from the power source.
- Locate the sensor bars inside the drum, usually near the lint filter.
- Mix warm water with a few drops of mild dish soap in a bowl.
- Dampen the soft cloth or sponge with the soapy water.
- Gently wipe the sensor bars to remove dust and dirt.
- Use a cloth dampened with white vinegar or rubbing alcohol to remove stubborn spots.
- Dry the sensor bars thoroughly with a clean towel.
- Plug the dryer back in and test the drying cycle.
Removing Residue Buildup
Residue from fabric softeners or dryer sheets often covers the sensor bars. This layer blocks moisture detection and causes drying issues. Use white vinegar or rubbing alcohol to dissolve and remove the buildup. Apply the liquid to a cloth, then gently rub the sensor bars. Avoid harsh scrubbing to prevent damage. Clean the bars regularly to maintain dryer performance and avoid sensor problems.
Credit: www.youtube.com
Testing The Sensor
Testing the moisture sensor in your dryer helps find issues causing poor drying. The sensor detects moisture and signals the dryer to stop when clothes are dry. A faulty sensor can lead to wet clothes or over-drying. Proper testing requires simple tools and understanding sensor behavior.
Using A Multimeter
Start testing by turning off the dryer and unplugging it. Locate the moisture sensor bars inside the dryer drum. Use a multimeter set to measure resistance (ohms). Touch the multimeter probes to the sensor terminals. This checks if the sensor is working or has a short circuit.
Reading Resistance Values
Read the resistance value shown on the multimeter screen. A good sensor shows some resistance when dry. A reading of zero ohms means a short, indicating a bad sensor. Infinite or very high resistance means the sensor might be broken or disconnected. Note the values carefully for comparison.
Wet Vs Dry Sensor Response
Wet the sensor bars with a damp cloth to simulate wet clothes. Measure resistance again with the multimeter. The resistance should change from the dry reading. If the resistance stays the same, the sensor does not respond properly. This confirms the sensor needs replacement.
Sensor Replacement
Replacing a dryer moisture sensor can restore your dryer’s ability to detect moisture accurately. This part ensures clothes dry properly without wasting energy or damaging fabric. Sensor replacement is a practical fix when cleaning does not solve the problem. Understanding when to replace and how to choose the right part helps avoid extra costs.
When To Replace
Replace the sensor if your dryer over-dries or under-dries clothes. Persistent errors after cleaning sensor bars indicate sensor failure. Testing with a multimeter can confirm if the sensor is faulty. A reading of zero ohms when dry or no change when wet means replacement is needed.
Choosing The Right Part
Select a sensor that matches your dryer’s make and model. Using the correct part ensures proper function and fit. Check your dryer’s manual or online resources for the exact sensor type. Avoid generic parts to prevent compatibility issues.
Basic Replacement Steps
Unplug the dryer before starting any repair. Locate the moisture sensor bars inside the drum. Remove the dryer’s front panel or lint filter housing to access the sensor. Disconnect the old sensor from its wiring harness carefully. Attach the new sensor and reconnect the wiring. Reassemble the dryer and plug it back in. Run a test cycle to check sensor performance.
Credit: paradiseapplianceservice.com
Other Dryer Troubleshooting
Other dryer problems can cause drying issues aside from moisture sensor faults. These issues affect drying performance and energy use. Checking these parts helps keep your dryer working well.
Simple checks can prevent big repairs. Regular maintenance saves time and money. Below are key areas to examine during troubleshooting.
Heating Element Check
The heating element warms the air inside the dryer. If it breaks, clothes will not dry properly. You can test the element with a multimeter for continuity. No continuity means the element needs replacement. Sometimes, the element looks damaged or burnt. Always unplug the dryer before inspecting the heating element. Replace it if you find any visible damage or if the test fails.
Ventilation And Airflow
Proper airflow is essential for drying clothes quickly. Blocked vents cause longer drying times and higher energy use. Check the dryer vent and duct for lint buildup or obstructions. Clean the vent outside and inside regularly. Make sure the vent hose is not crushed or kinked. Good airflow improves dryer efficiency and prevents overheating.
Lint Filter Maintenance
The lint filter traps fibers from clothes during drying. A clogged lint filter reduces airflow and drying performance. Clean the lint filter after every load. Wash it with soap and water monthly to remove residue. Never run the dryer without the lint filter in place. Proper lint filter care helps prevent fire hazards and keeps the dryer running smoothly.
Preventive Tips
Preventing problems with your dryer’s moisture sensor extends its life and improves drying performance. Simple care steps keep the sensor clean and responsive. These tips help avoid common issues that cause incorrect drying times.
Regular Sensor Cleaning
Clean the moisture sensor bars often to remove lint and dirt. Use a soft cloth with mild soap and water. Wipe gently to avoid damage. Dry the sensor fully before using the dryer again. Regular cleaning stops false readings and uneven drying.
Avoiding Fabric Softener Residue
Fabric softeners leave a film that blocks the sensor. Avoid spraying softener directly on clothes. Use dryer sheets sparingly or switch to liquid softener in the wash. Residue buildup makes the sensor less accurate and causes longer drying cycles.
Routine Dryer Maintenance
Check the dryer vent and lint trap regularly. Clear all lint to improve airflow and sensor function. Inspect the sensor for signs of wear or damage. Schedule professional maintenance yearly to keep all parts working well. Proper upkeep prevents sensor errors and saves energy.
Frequently Asked Questions
How Do I Know If My Dryer Moisture Sensor Is Bad?
A bad dryer moisture sensor causes inconsistent drying or over-drying. Clean sensor bars first. Test with a multimeter: zero ohms when dry or no resistance change when wet means replacement is needed.
Can You Run A Dryer Without A Moisture Sensor?
Yes, you can run a dryer without a moisture sensor, but it will use timed drying only. This may cause over-drying or under-drying of clothes. Moisture sensors help save energy and protect fabrics by detecting dampness and stopping the cycle when clothes are dry.
How Long Do Dryer Moisture Sensors Last?
Dryer moisture sensors typically last 5 to 10 years with proper care. Regular cleaning extends their lifespan and ensures accurate drying. Replace sensors if drying issues persist despite cleaning.
How To Clean A Dryer Moisture Sensor?
Locate the metal sensor bars inside the dryer drum. Wipe them gently with a soft cloth and rubbing alcohol. Remove residue from fabric softeners or sheets. This often restores sensor function and improves drying performance.
What Causes Dryer Moisture Sensor Problems?
Dirt, lint buildup, or faulty sensors can cause inaccurate moisture detection in dryers.
Conclusion
Dryer moisture sensor problems can cause uneven drying and wasted energy. Clean the sensor bars regularly to avoid issues. Test the sensor with a multimeter if drying seems off. Replace the sensor if it shows no change in resistance when wet.
Fixing these problems helps clothes dry properly and saves time. Keep an eye on your dryer’s performance to catch issues early. Simple maintenance can prevent bigger repair costs later. Stay proactive for better drying results every time.