
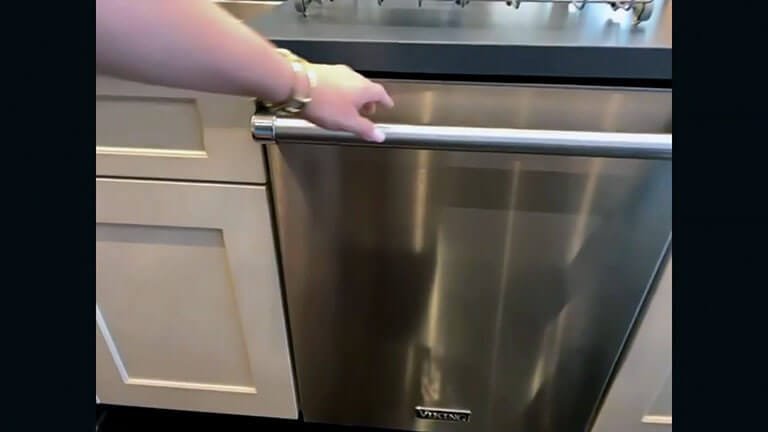
Is your Viking dishwasher not draining properly? This common problem can be frustrating.
Let’s explore why this happens and how to fix it. A dishwasher that doesn’t drain can be a real headache. Pooled water and dirty dishes can disrupt your daily routine. Several factors can cause this issue, from clogged filters to faulty pumps.
Understanding the root cause helps in fixing the problem efficiently. In this blog post, we’ll discuss the common reasons your Viking dishwasher might not be draining and provide you with practical solutions. With the right knowledge, you can get your dishwasher back to working order quickly. Let’s dive in and resolve this issue together.
Common Causes
Is your Viking dishwasher not draining? This problem can be frustrating. Understanding the common causes can help you fix it. Here are some of the main reasons why your dishwasher may not be draining properly.
Clogged Filter
A common cause is a clogged filter. Food particles and debris often get stuck in the filter. This blocks the water from draining out. Regularly cleaning the filter can prevent this issue.
Blocked Drain Hose
Another common cause is a blocked drain hose. The drain hose can get clogged with food particles or other debris. This stops the water from draining. Check the hose for any blockages and clear them if needed. Use a long brush to clean inside the hose.
Tools Needed
Facing a Viking dishwasher not draining can be frustrating. To fix it, you need the right tools. This guide will help you gather what you need. Let’s get started.
Basic Tools
First, let’s talk about basic tools. These are common household items. You may already have them.
- Screwdrivers: Both Phillips and flathead.
- Pliers: Regular and needle-nose.
- Bucket: To catch water.
- Towels: For cleaning up any spills.
- Flashlight: To see dark areas under the dishwasher.
These tools are essential. They help you remove and inspect parts. Make sure to have them ready.
Specialized Equipment
You might need specialized equipment too. These tools are specific to dishwasher repairs.
- Multimeter: To check electrical connections.
- Drain Snake: For clearing clogs in drain lines.
- Dishwasher Cleaner: To remove buildup and improve drainage.
Using specialized equipment makes the job easier. It ensures you fix the issue correctly.
| Tool | Purpose |
|---|---|
| Screwdrivers | Remove screws, open panels |
| Pliers | Grip and twist components |
| Bucket | Catch draining water |
| Towels | Wipe up spills |
| Flashlight | Illuminate dark areas |
| Multimeter | Check electrical connections |
| Drain Snake | Clear drain clogs |
| Dishwasher Cleaner | Remove buildup |
Having the right tools is key. It makes the repair process smoother. Now that you know what you need, you can tackle the problem with confidence.
Safety Precautions
Dealing with a Viking dishwasher not draining can be frustrating. Safety must always be your first concern. Follow these precautions to stay safe while troubleshooting your dishwasher.
Power Off
Always turn off the power before working on your dishwasher. Unplug the appliance from the wall socket. This prevents electrical shocks and accidents. Never touch electrical components with wet hands.
Water Supply
Turn off the water supply to the dishwasher. Locate the water valve and switch it off. This prevents water leaks and flooding. Ensure the area around the dishwasher is dry.
Viking Dishwasher Not Draining? [Here is Checking The Filter]
Is your Viking dishwasher not draining? This can be frustrating. The issue might be a clogged filter. Cleaning the filter is crucial. It can save you from bigger problems. Let’s dive into the process of checking the filter.
Filter Location
The filter is inside the dishwasher. Open the dishwasher door. Look at the bottom of the tub. The filter is usually there. It may look like a small cylinder or a mesh screen.
Cleaning Process
Cleaning the filter is simple. Follow these steps:
- First, turn off the power to the dishwasher. Safety is key.
- Next, remove the bottom rack. This gives you access to the filter.
- Locate the filter. Twist it counterclockwise to remove it.
- Once removed, rinse the filter under running water. Use a soft brush to scrub off debris.
- Check the filter housing inside the dishwasher. Clean any debris you find.
- After cleaning, replace the filter. Twist it clockwise to secure it.
- Finally, put the bottom rack back in place.
Remember to clean the filter regularly. This ensures your Viking dishwasher runs smoothly. A clean filter prevents draining issues.
Inspecting The Drain Hose
Is your Viking dishwasher not draining? The problem might lie in the drain hose. This component is crucial for proper drainage. Inspecting it can resolve many issues. Let’s explore how to inspect and clean the drain hose.
Hose Disconnection
Start by unplugging the dishwasher. This ensures your safety. Locate the drain hose at the back of the dishwasher. You will need to disconnect it. Loosen the clamps holding the hose. Gently pull the hose away from the dishwasher. Be careful not to damage it.
Hose Cleaning
Check the hose for any blockages. Debris can often clog it. Use a long brush to clean the inside. Push the brush through the hose to remove any buildup. Rinse the hose with water. This helps clear out any remaining debris. Reconnect the hose to the dishwasher. Tighten the clamps to secure it.
Examining The Garbage Disposal
Examining the garbage disposal can help identify why a Viking dishwasher is not draining. Food particles often clog the disposal, preventing water flow.
When your Viking dishwasher is not draining, examining the garbage disposal is crucial. The garbage disposal connects to the dishwasher, helping to clear out food debris. If there is a problem here, it can cause draining issues.
Let’s look at some key areas to inspect.
Connection Points
First, check the connection points between the dishwasher and the garbage disposal. Look for any loose or blocked hoses. A loose hose can lead to leaks and blockages. Ensure all clamps are secure and tight.
Clearing Blockages
Next, inspect the garbage disposal itself. Food particles can clog the disposal, preventing proper drainage. Run the disposal to clear any debris. If the disposal is not functioning, it could be the root of the problem.
You can also use a flashlight to look for visible blockages. Remove any visible debris with a tool or your hand. Always turn off the power before doing this.
By inspecting these areas, you can often solve draining issues quickly.
Testing The Drain Pump
If your Viking dishwasher is not draining, testing the drain pump can help you identify and fix the problem. The drain pump is a crucial component that pushes water out of the dishwasher. Faulty drain pumps can lead to water pooling at the bottom of the appliance. This guide will walk you through how to access and test the drain pump.
Pump Access
To test the drain pump, you need to access it first. Here’s how:
- Disconnect the dishwasher from the power supply. Safety first.
- Remove the lower dish rack to gain better access.
- Locate the drain pump. It is usually at the bottom of the dishwasher.
- Remove the kickplate or bottom panel. This will expose the drain pump.
Pump Functionality
Once you have access, it’s time to test the pump’s functionality. Follow these steps:
- Check the pump for any visible damage or blockages.
- Use a multimeter to test the pump’s continuity. Set the multimeter to the lowest ohms setting.
- Touch the multimeter probes to the pump terminals. A reading between 0 and 50 ohms means the pump is functional.
- If the reading is outside this range, the pump needs replacement.
Here’s a quick reference table for multimeter readings:
| Reading | Condition |
|---|---|
| 0-50 ohms | Functional Pump |
| Outside 0-50 ohms | Faulty Pump |
Reassembling And Testing
After you have successfully identified and fixed the issue with your Viking dishwasher not draining, the next crucial step is reassembling and testing. This ensures that all parts are correctly placed and the dishwasher functions properly. Follow these steps to make sure everything is in order.
Reconnecting Parts
Start by reconnecting all the parts you had detached. Make sure you carefully follow these steps:
- Reconnect the drain hose to its original position.
- Secure all clamps and screws tightly.
- Attach the filter back into place.
Double-check each connection to ensure nothing is loose. This step is crucial to avoid any leaks or malfunctions.
Running A Test Cycle
Once all parts are reconnected, it’s time to run a test cycle:
- Close the dishwasher door securely.
- Select a quick wash or rinse cycle.
- Press the start button and observe the process.
Watch for any signs of leaks or errors. If the dishwasher drains properly, your task is complete. If not, you may need to revisit the steps to ensure everything is correctly aligned.
By following these detailed steps, you can ensure your Viking dishwasher is back to its optimal performance. This not only saves you money on repairs but also extends the life of your appliance.
Frequently Asked Questions
Why Is My Viking Dishwasher Not Draining?
Your Viking dishwasher might not be draining due to a clogged filter, blocked drain hose, or faulty pump.
How Do I Fix A Clogged Dishwasher Filter?
Remove the filter, clean it with warm water and a brush, then reinstall it in the dishwasher.
Can A Blocked Drain Hose Cause Drainage Problems?
Yes, a blocked drain hose can prevent the dishwasher from draining properly. Check and clean it if necessary.
How Often Should I Clean My Dishwasher Filter?
Clean your dishwasher filter at least once a month to ensure proper drainage and performance.
What Should I Do If My Dishwasher Pump Is Faulty?
If the pump is faulty, contact a professional technician to inspect and replace it if necessary.
Conclusion
Solving a Viking dishwasher not draining issue is possible. Check the filter and drain hose. Clean them regularly to prevent clogs. Ensure the garbage disposal is clear. Regular maintenance keeps your dishwasher running smoothly. If problems persist, consult a professional.
Proper care extends your dishwasher’s life. Save money and avoid frustration. Keep your Viking dishwasher in top shape with these simple tips. Happy cleaning!