
Many people love their Ninja Blender for smoothies, soups, and more. But when the blender’s light starts blinking, it can stop your kitchen plans. A blinking light is not just an annoyance—it’s often a warning. It means something is wrong, and you need to fix it before you blend again. Sometimes, the solution is simple. Other times, you may need to check parts or even replace them.
Understanding what the blinking light means, why it happens, and how to fix it can save you time and stress. This guide will help you find the cause of the blinking light on your Ninja Blender. You’ll learn how to troubleshoot it step by step.
By the end, you’ll be ready to get your blender working again, avoid common mistakes, and know when it’s time to call for help.
Why Does The Ninja Blender Light Blink?
A blinking light on your Ninja Blender is a signal. It’s not just a random problem. The blinking tells you the blender has detected an issue that needs attention. Most Ninja Blender models use a blinking light to warn about:
- Safety lock problems
- Improper assembly
- Overheating
- Jammed blades
- Power or electrical issues
Each reason can have its own fix. But many owners don’t know what each blinking pattern means. Some models even use different colors or blinking speeds for specific problems.
The Most Common Reasons
1. Improper Assembly
If your blender is not put together correctly, it will not start. The blinking light is a safety feature. It helps prevent damage or injury.
2. Lid Or Pitcher Misalignment
Ninja Blenders often require that the lid and pitcher are locked in a certain way. If these parts are not aligned, the light will blink.
3. Overheating
If you use the blender for too long, it can overheat. The blinking light tells you to let it cool.
4. Jammed Blades
When something stops the blades from moving, the motor senses this and signals with a blinking light.
5. Power Connection Issues
If the blender is not plugged in well, or if the socket is faulty, the light may blink.
6. Damaged Parts
Sometimes, wear and tear or a broken part can cause the safety sensors to blink the light.
How To Troubleshoot A Blinking Light On Your Ninja Blender
Before you panic, follow these steps to find and fix the problem. Most blinking light issues can be solved at home with patience.
1. Check The Assembly
Make sure every part of your blender is assembled correctly. For most Ninja Blenders, this means:
- The pitcher sits firmly on the base.
- The handle is facing the front or at a specific angle.
- The lid is locked in place with the release button snapped down.
If just one piece is off, the safety sensors will not allow the blender to run.
2. Inspect The Lid And Pitcher
Many Ninja models require the lid and pitcher to align perfectly. Look for arrows or marks that show the correct position. The lid often has a locking arm or button. Push it down until you hear a click. If you skip this, the blender will keep blinking.
3. Examine The Power Source
Check the outlet and plug. Try another device in the same outlet to make sure it’s working. If the plug is loose, the power may cut in and out, causing the light to blink. Avoid using extension cords, as they can sometimes cause power drops.
4. Let The Blender Cool Down
If you’ve been blending for a long time or with heavy ingredients, your blender might overheat. Turn off the blender, unplug it, and let it rest for at least 15–30 minutes. Most models have a thermal cutoff switch that resets after cooling.
5. Look For Jammed Blades
Sometimes, food or ice can jam the blades. Unplug the blender, remove the pitcher, and check if the blades move freely. If not, use a wooden spoon to gently dislodge any stuck items. Never use your fingers, as the blades are very sharp.
6. Inspect For Damaged Parts
Check the base, pitcher, and lid for cracks or broken pieces. Look at the blade assembly—if it is loose or wobbly, it may need replacement. Worn gaskets or seals can also trigger the safety sensors.
7. Reset The Blender
Some models have a reset button, usually on the base. If your model does, press it to clear any errors. If not, unplug the blender for a few minutes, then plug it back in.
8. Review Your Blender Manual
Every Ninja Blender model is a bit different. The manual will have a troubleshooting section. If you don’t have your manual, you can usually find it on the official Ninja website.
Key Features Of Ninja Blenders That Affect The Light
Understanding your blender’s safety features can help you avoid blinking light issues in the future. Here are some important features:
Safety Lock System
Ninja Blenders use a safety lock system to prevent accidents. If the lid and pitcher are not in the correct position, the blender will not turn on. The blinking light warns you about this.
Overload Protection
If you fill your blender with too many ingredients, or if something jams the blades, the motor will stop. The blinking light tells you to fix the overload before blending again.
Thermal Protection
Blenders have sensors that detect heat. If the motor gets too hot, the blender stops and blinks to prevent damage. After cooling, it usually works again.
Smart Programs
Some newer Ninja models have smart programs. These programs can detect assembly, load, and even ingredient type. If the program finds a problem, it will alert you with a blinking light.
Common Ninja Blender Models And Their Blinking Light Codes
Different Ninja models have their own blinking light patterns. Here is a quick comparison of how some popular models signal problems:
| Model | Blinking Light Pattern | Common Causes |
|---|---|---|
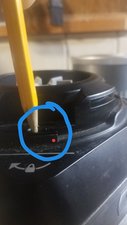
| Nutri Ninja Pro | Solid red/blinking red | Improper lid or cup placement |
| Ninja Professional BL610 | Blinking power light | Pitcher or lid not locked, overfill |
| Ninja Foodi Power Blender | Blinking blue light | Improper assembly, overheating |
| Ninja Auto-iQ | Blinking IQ light | Program error, incorrect assembly |
If you know your model, check your manual or the Ninja support page for the exact meaning of the blinking pattern. This can save you time in finding the right fix.
How To Fix Blinking Light Problems: Step-by-step Solutions
Let’s walk through the solutions for each common cause.
Fixing Improper Assembly
- Unplug the blender.
- Remove the pitcher and lid.
- Reattach the pitcher to the base firmly.
- Line up the handle as recommended (usually facing you).
- Place the lid on top, making sure the locking arm or tab snaps into place.
- Plug in the blender and check the light.
Solving Lid Or Pitcher Misalignment
- Check for arrows or guides on both the lid and pitcher.
- Make sure the lid’s release button is down.
- If your blender has a locking tab, press it until you hear a click.
- The pitcher handle should align with the front or side, depending on your model.
Stopping Overheating
- Turn off the blender if you smell burning or see the light blinking after heavy use.
- Unplug and wait at least 20–30 minutes.
- Do not run the blender for more than 1–2 minutes at a time with thick mixtures.
Unjamming The Blades
- Always unplug the blender before checking the blades.
- Use a wooden or plastic tool to remove stuck food.
- Clean the blades after every use to prevent buildup.
Fixing Power Issues
- Try a different power outlet.
- Do not use extension cords.
- If the plug or cord is damaged, do not use the blender—replace the cord or contact Ninja support.
Replacing Damaged Parts
- If the pitcher, lid, or blades are broken, order replacement parts from the Ninja website or authorized sellers.
- Never use a cracked or broken blender, as it can be unsafe.
Ninja Blender Care Tips To Prevent Blinking Lights
A little care goes a long way. Here’s how you can avoid most blinking light problems:
- Always assemble carefully. Double-check that everything clicks in place.
- Do not overfill. Follow the max fill line on the pitcher or cup.
- Let the blender rest. Pause between long blends to avoid overheating.
- Clean after each use. Food buildup can cause jams and sensor problems.
- Check for wear. Replace gaskets and seals if they look old or damaged.
- Store properly. Keep your blender in a dry place, and avoid dropping it.
Real-world Examples Of Ninja Blender Blinking Light Issues
Let’s look at some real stories from users and what they learned.
Example 1:
Maria tried to make a smoothie, but her Ninja blender’s light kept blinking. She was in a hurry and kept pushing the power button. Nothing worked. Finally, she noticed the pitcher was not locked in place. After lining up the handle and snapping the lid, the light stopped blinking and the blender worked.
Example 2:
John used his Ninja Foodi blender to crush ice for frozen drinks. After 10 minutes, the light started blinking and the blender stopped. He was worried he broke it. But after letting it cool for 30 minutes, the blender worked fine again.
He learned not to run the blender for so long with tough ingredients.
Example 3:
Sonia’s blender kept blinking even though she assembled it carefully. After checking the manual, she saw that her model required the lid’s release button to be pressed down. She missed this small detail at first. Once she pressed it, the blender worked.
These examples show that small details—like a lid not fully closed or running the blender too long—are common causes for blinking lights.
Ninja Blender Light Blinking: What Not To Do
Sometimes, people make mistakes that make the problem worse or even damage their blender. Here are some things to avoid:
- Do not force the blender to run if the light is blinking. This can burn out the motor.
- Never use metal tools to remove jammed food from the blades. Metal can damage the blades or cause injury.
- Do not ignore a blinking light for many uses. It means a real problem exists.
- Avoid DIY repairs unless you are sure what you are doing. Incorrect repairs can void your warranty.
Comparison Of Ninja Blender Blinking Light Vs. Other Blender Brands
How does Ninja compare to other brands when it comes to blinking lights and safety features?
| Brand | Blinking Light Indicator | Common Causes | Average Troubleshooting Time |
|---|---|---|---|
| Ninja | Yes | Assembly, overheating, jams | 5–15 minutes |
| Vitamix | No (uses error codes) | Overheating, overload | 10–20 minutes |
| Oster | Some models | Assembly errors | 5–10 minutes |
| NutriBullet | No (stops running) | Jams, misalignment | 5–10 minutes |
Ninja’s blinking light system is actually helpful for most users. It gives a clear warning, so you know to stop and check assembly or overheating. Other brands may not give clear signals, which can be confusing for beginners.
When To Contact Ninja Support
If you have tried all the steps above and your blender’s light keeps blinking, it’s time to call for help. Here are signs that you need professional support:
- The blinking light will not turn off even after reassembly and cooling.
- You hear strange noises or smell burning.
- The blender base or cord is damaged.
- The blender is under warranty and you suspect a defect.
You can contact Ninja customer support through their official site or phone number. Make sure to have your model number and purchase date ready. They may ask you to send in the blender for repair or replacement.
If you need more technical support, you can check the official Ninja Kitchen website: Ninja Kitchen Support.

Ninja Blender Maintenance Checklist
Keeping your blender in top shape helps prevent most blinking light problems. Here’s a quick checklist:
- Rinse and dry all parts after each use.
- Inspect the lid and pitcher for cracks.
- Check the blades for stuck food.
- Make sure the gasket is not worn.
- Store the blender unplugged and dry.
- Test the blender once a month if you use it rarely.
Two Non-obvious Insights Most Beginners Miss
1. Blender Weight Sensors:
Some Ninja models use small sensors in the base to detect the pitcher’s weight. If you use a non-standard pitcher or cup, the sensor may not activate, causing the light to blink. Always use the pitcher or cup that came with your model.
2. Gasket Placement:
The rubber gasket under the blade assembly is easy to overlook. If it’s out of place or missing, the safety lock will not work, and the light will blink. Check that the gasket is seated correctly every time you reassemble the blender.
Frequently Asked Questions
Why Is My Ninja Blender Power Light Blinking And Not Working?
The blinking power light means your blender has detected a problem. The most common reasons are improper assembly, misaligned lid or pitcher, or overheating. Double-check that every part is locked in place and let the blender cool if you have used it for a long time.
How Do I Reset My Ninja Blender After The Light Blinks?
Most Ninja Blenders reset automatically after cooling down or reassembly. If your model has a reset button, press it. If not, unplug the blender, wait 3–5 minutes, and plug it back in. This usually clears any error.
Can I Use My Blender If The Light Is Blinking?
No, you should not use the blender while the light is blinking. The blinking is a safety feature. It means there is a problem—like misassembly, overheating, or a jam—that you need to fix before blending.
Do All Ninja Blenders Have Blinking Lights For Errors?
Most modern Ninja Blenders use blinking lights to signal errors. Older models may use solid lights or just not run at all. Check your manual for your model’s signals.
What If My Blender Blinks Even After I Assemble It Correctly?
If you have checked assembly, power, and overheating, but the light still blinks, inspect the pitcher, lid, and gasket for damage or wear. If everything looks fine, there may be a problem with the sensors or electronics. Contact Ninja support for help.
The blinking light on your Ninja Blender is not a reason to worry—it’s a helpful warning. With the steps and insights in this guide, you can solve most blinking light problems quickly and safely. Remember to use your manual, care for your blender, and don’t ignore warning signals.
With a little attention, your Ninja Blender will last for years, making your favorite drinks and meals with ease.